It's been exactly a year (and a few days) since I finished my first ever blazer. After I finished that Lekala pattern, I was both proud of myself for being ambitious enough to tackle it, but also looking for a game plan on how to do better (especially with the lining, which really messed with the outer shell).
As I became more familiar with the different pattern-makers over the past year, I found several blazer patterns along the way— Closet Core Jasika Blazer being one of them.
Especially appealing was that Closet Core sells kits which include nearly everything you need (minus the fabric) to make their blazer. Since I've never worked with some of these materials (horsehair canvas, twill tape, weft interfacing, etc.), I was glad to get a package of something that I knew was exactly what the designer intended for this garment.
To seal the deal, Closet Core also offers an online class that takes you through every step of sewing the blazer (I swear I wasn't paid for this review, these are all just the exact things my precious little anxious heart needed to feel confident enough to get a small glimpse of the world of tailoring).
Fabric
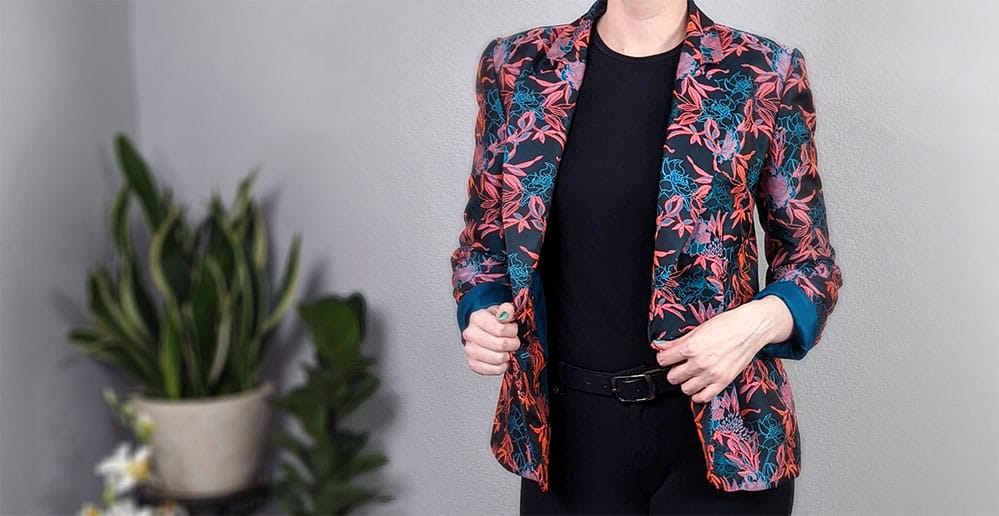
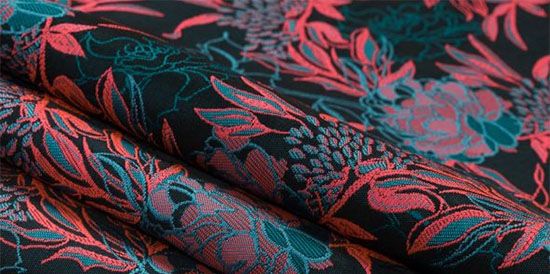
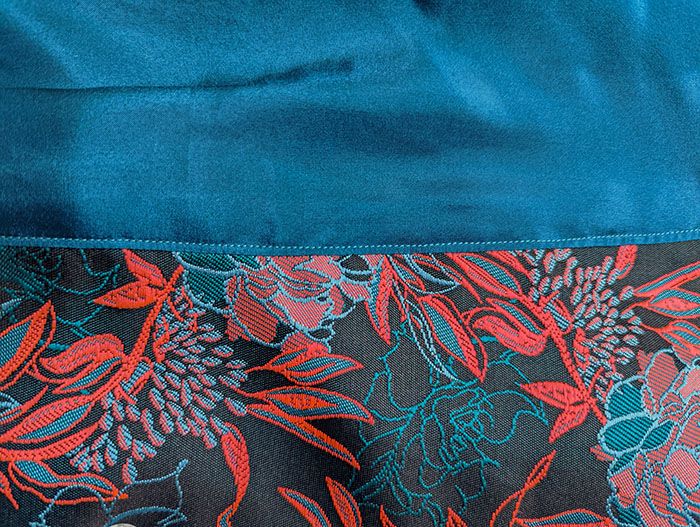
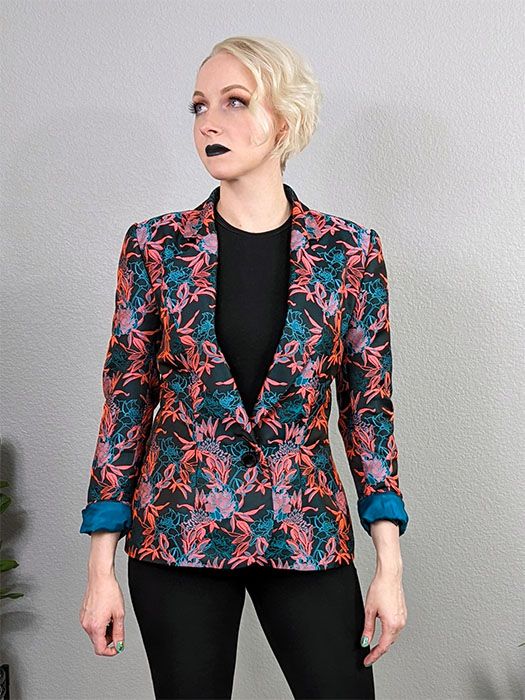
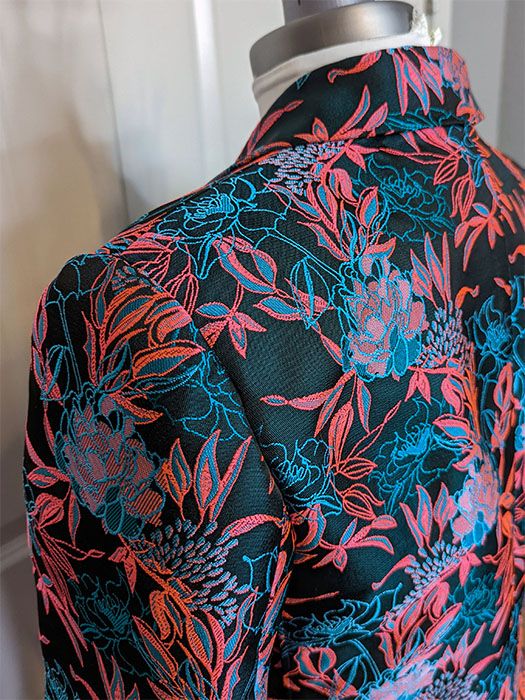
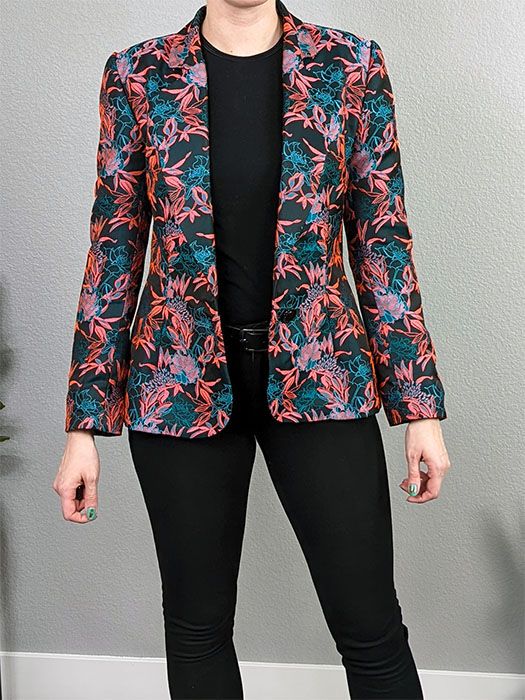
Since my previous blazer attempt was made with this jacquard fabric (and I loved it), I wanted to try this other colorway.
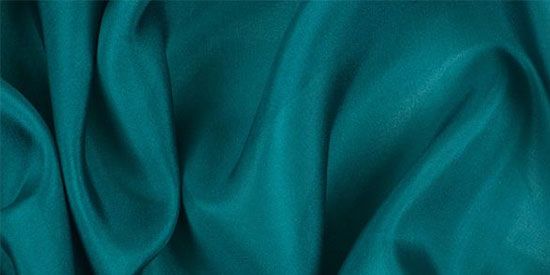
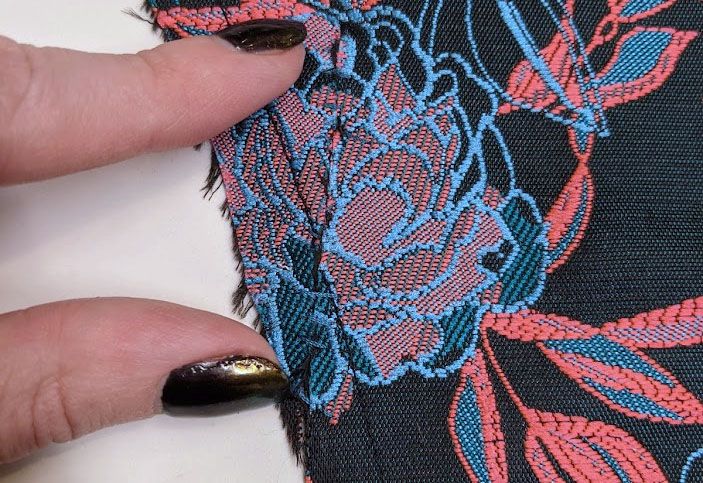
I also already knew that the jacquard frays like crazy and is difficult to press. The habotai was difficult to work with in it is own silky way. But being mentally prepared for the challenge helped.
Pattern Details & Modifications
I chose to sew the size 10 (A/B cup). My current bust/waist/hip measurements are 36/29/40" and that seemed to line up pretty well with how I wanted it to fit.
- I shortened the pattern by 1" at the lengthen/shorten line since I am short-waisted (note: I think I forgot to repeat this modification on the lining because it came out a little wonky).
- I chose to not do the pockets. Partially because I felt like the pattern was already very busy and I didn't want the visual line to be interrupted by a pocket. And second, since the fabric frays so bad, I knew it'd be a huge pain in the butt. If I had solid/light-colored fabric (like wool), I think pockets would be a really lovely design detail.
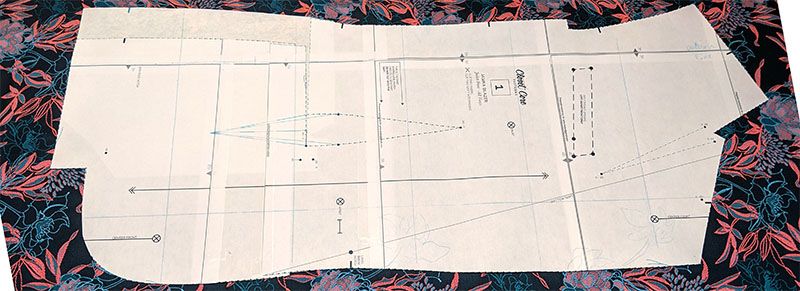
I modified the pattern piece to have a fisheye dart like this (and added some extra paper to make up for the lack of pocket. I just tried to follow the lines):
I was a big fan of how this pattern was laid out, and it's clear to see the professionalism in drafting. My biggest pet peeve in PDF patterns is when it's not easy to print out just a part of the pattern to make a toile (draft).
However for this PDF pattern, it was easy to print out and assemble only the bodice/sleeves for the muslin (and not waste a bunch of paper printing unnecessary pieces for me at that time).
Another annoying thing with PDF patterns is when they reach 50+ pages, it gets more and more difficult to assemble them correctly. Being off by just a millimeters on a few pages really adds up after you get to 10+ rows of pages. With the Jasika Blazer pattern, the pieces were broken up in a great way where I could do it in batches (rather than assembling all 90 pages at once; so don't get overwhelmed ☺)
Close Core Blazer Making Course Video
I found it helpful to go through the video before I even started sewing. I put the whole thing on 2x speed and watched it while skimming along on the PDF pattern instruction.
Once I started the actual sewing, I went back to the beginning of the video (resumed normal speed), and followed along section by section, pausing and rewinding many times.
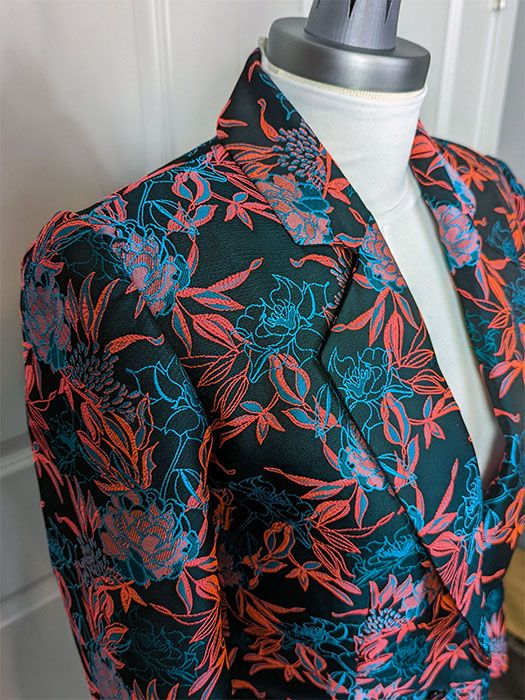
The video was helpful both for explaining the "how" and the "why" and gave fantastic instruction for a lot of sewing concepts that were new for me. For example: best practices of grading to reduce seam bulk (e.g. how to grade a lapel and front of blazer where you have seams that switch from inside to outside).
In many patterns I sew, I have at least one moment (but let's be real, probably many, many moments) where instructions are unclear and I have a moment of "I'm not sure if I'm doing this right, but I'm going to do it and bust out the seam ripper if necessary, later."
Those moments were much less during this project than usual. The things I did mess up were purely from me not playing close enough attention (not the lack of instruction). This is especially impressive considering how many new methods and techniques this garment entailed.
Bottom line — both the video and the PDF worked in wonderful tandem to fill in gaps that either had, and I feel like my money was well-spent on the video course.
Toile
I made my toile back in early September.
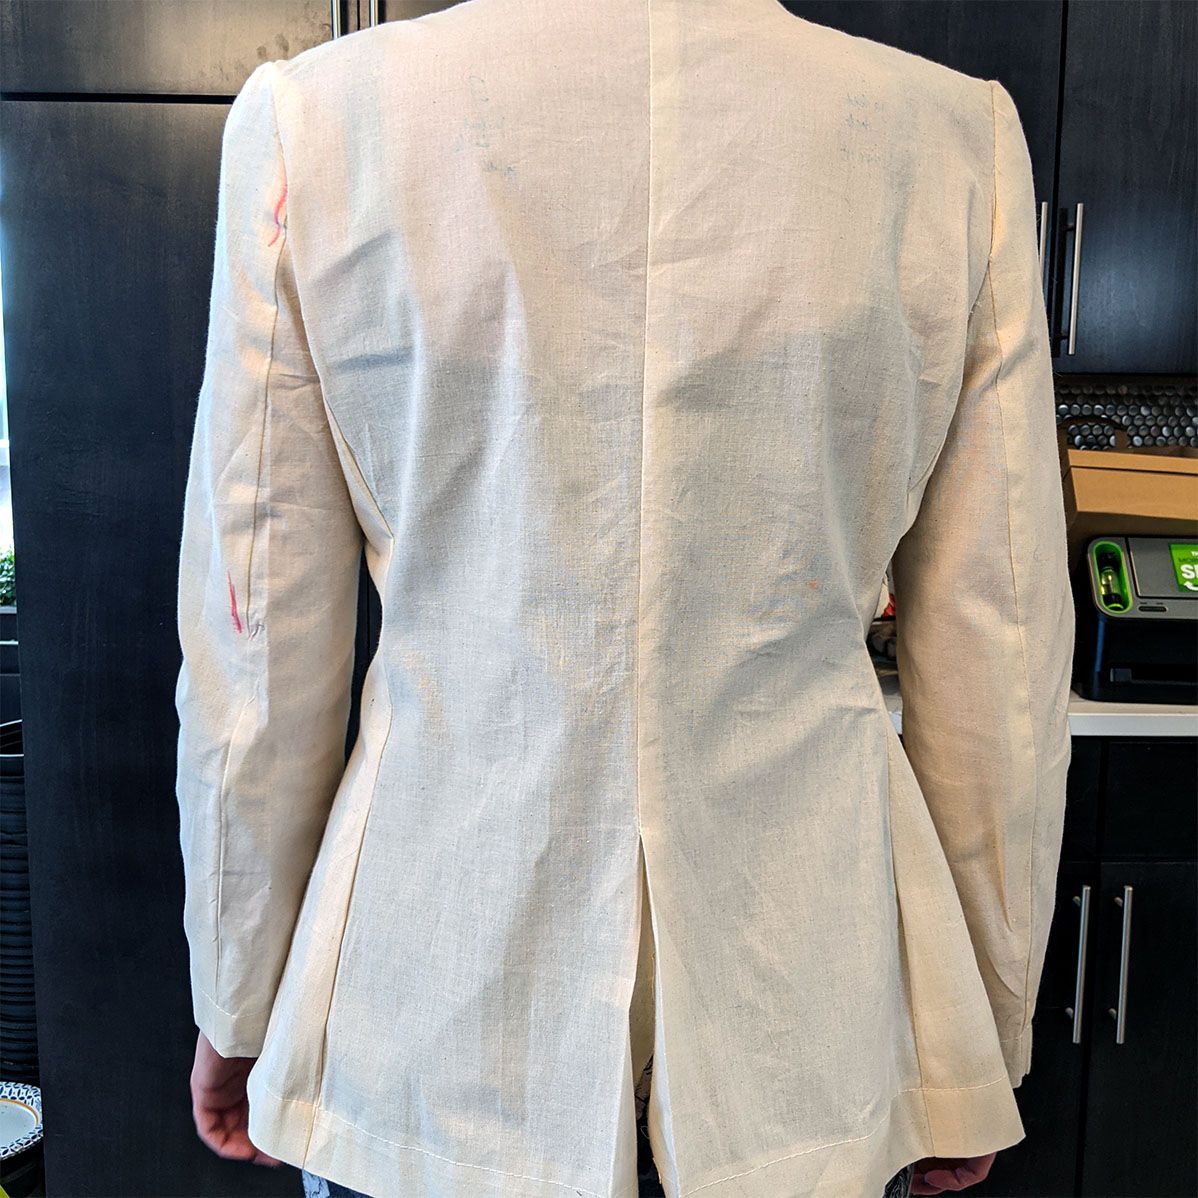
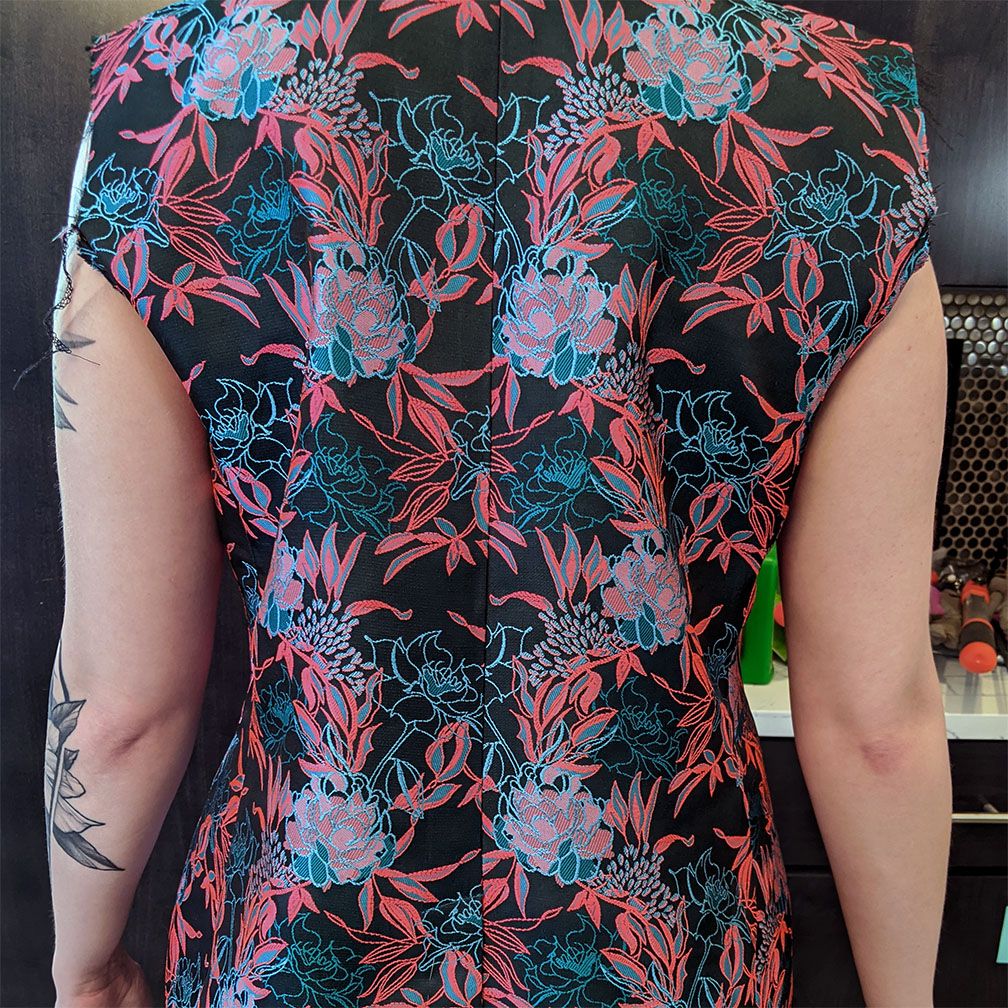
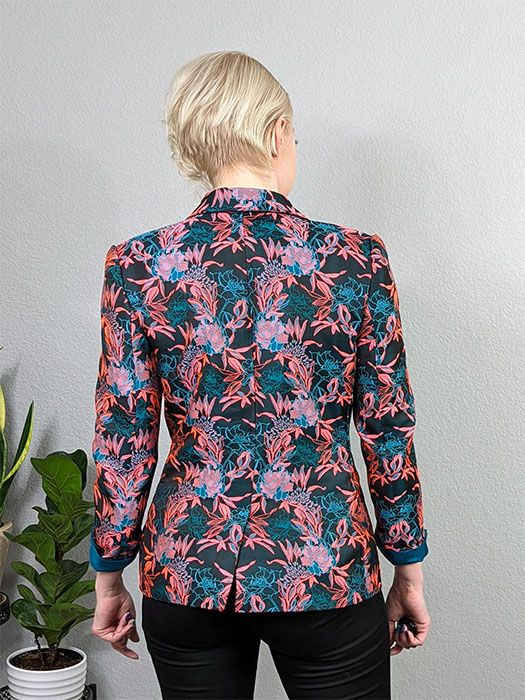
The thing that bothered me the most were the vertical lines on the back view. I was also considering making some small fixes to the fit of the waist, but ultimately didn't want to mess around with the pattern too much (this time).
One thing I found very helpful was to fit the toile with shoulder pads in place, because those did correct some of the possible fit issues.
Preparing the Fabric
Interfacing
This was my first time doing block fusing (i.e. fusing interfacing to the fabric before cutting the fabric out). I think that's something that will need more practice, but I like it because I didn't have to perfectly line up the fabric and interfacing and hope it doesn't move while I'm pressing.
I ended up block-fusing just under a yard (~33") of the main fabric. It would've been perfect if it was a solid color, but because I was trying to make the pattern mirrored across the two sides of the blazer, I had to add a tiny bit to one of the front panels that ended up offset due to trying to match the pattern.
It would've been nice to have maybe even half a yard more interfacing on hand (than what came in the tailoring kit) to be able to pattern-match better.
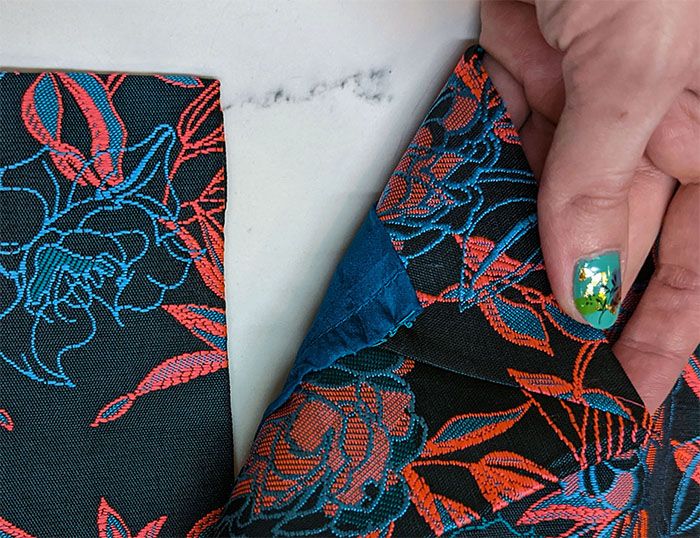
Pattern Matching
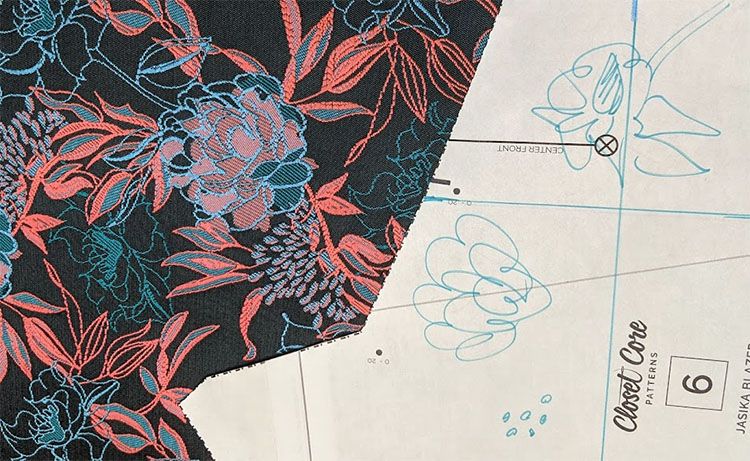
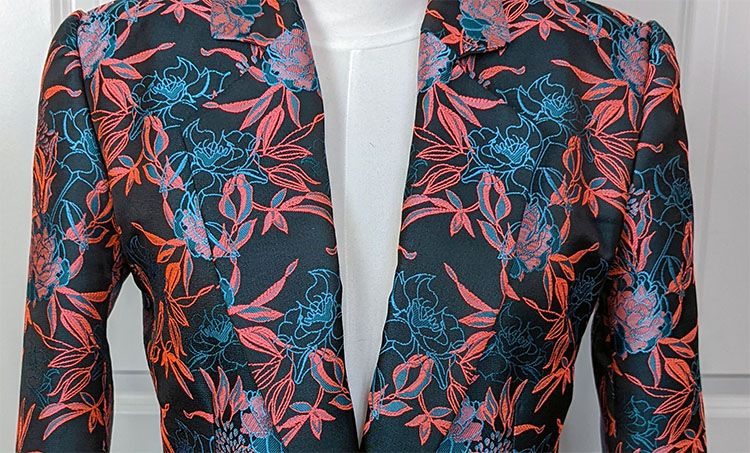
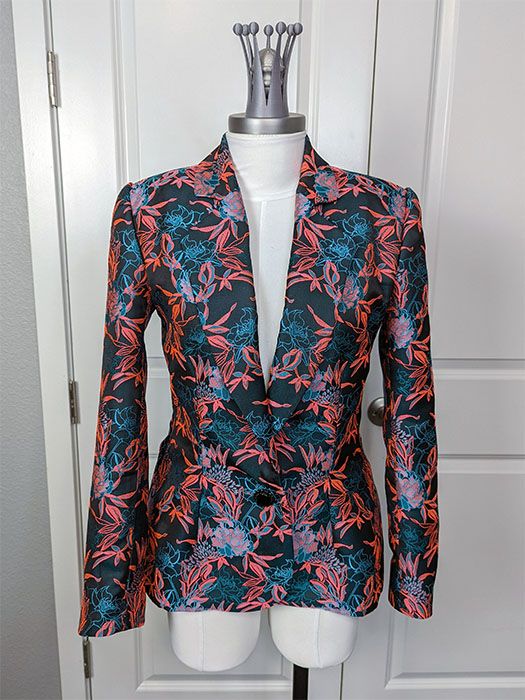
Possibly overreaching, but I decided I wanted to at least attempt to pattern match the floral pattern. I love those little "high end" details like a pattern being perfectly mirrored across the center line or continuing across pieces.
At the end, I was running out of fabric, so I had to make some choices of what I could and couldn't pattern match. I decided to focus on the front panels and lapels as much as I could. To accomplish this, I busted out my markers and (crudely) traced the pattern of the fabric onto the pattern piece. This method actually worked out kind of okay!
On some of the pieces (e.g. the back panels) I forgot to factor in seam allowance, but it was a solid strategy for the pieces I cared most about.
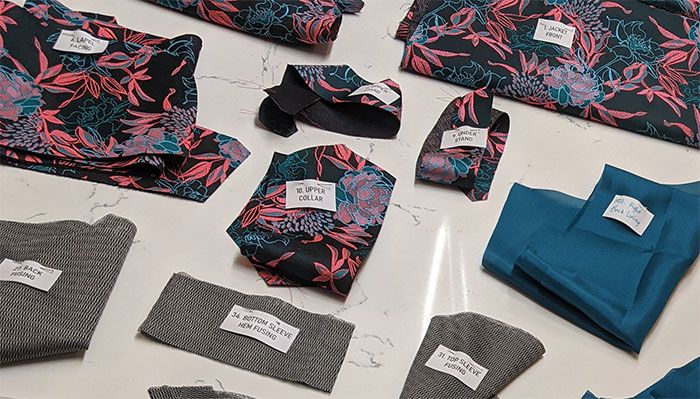
Staying Organized
Because there were so many pieces for this pattern and this fabric did not hold chalk or any sort of marking very well (also why I found it easier to use a rotary cutter), I found it helpful to label each piece of the pattern with a paper label pinned to the piece.
Outer Shell
I had a tragedy while sewing the outer shell where I sliced into the fabric while trying to finish edges with a serger. I patched it up with some Fray Check, a little piece of interfacing, and some hand stitching.
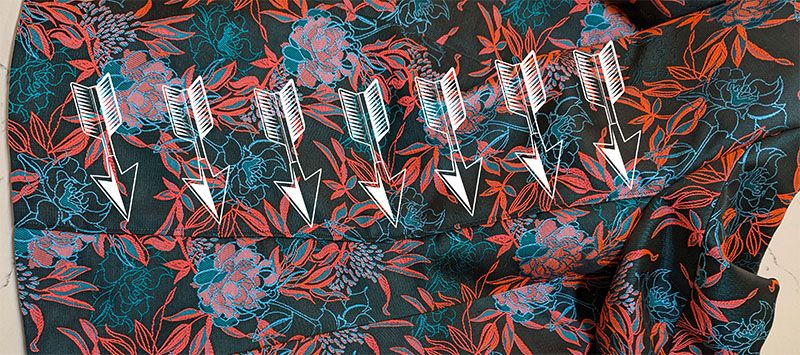
One thing I did notice when I tried it on was these drag lines on the back (which I did have with the toile, so I was kind of expecting it), but they bothered me more than before.
To address the issue, I folded over one of the sides to take it in just a little bit, top stitched it, and I feel like that helped address the extra fabric there.
Even though it helped with the lines, it did feel like it made the blazer feel more constricted and harder to move my arms forward, so maybe there's a trade-off, or opportunities for adjustment of the pattern.
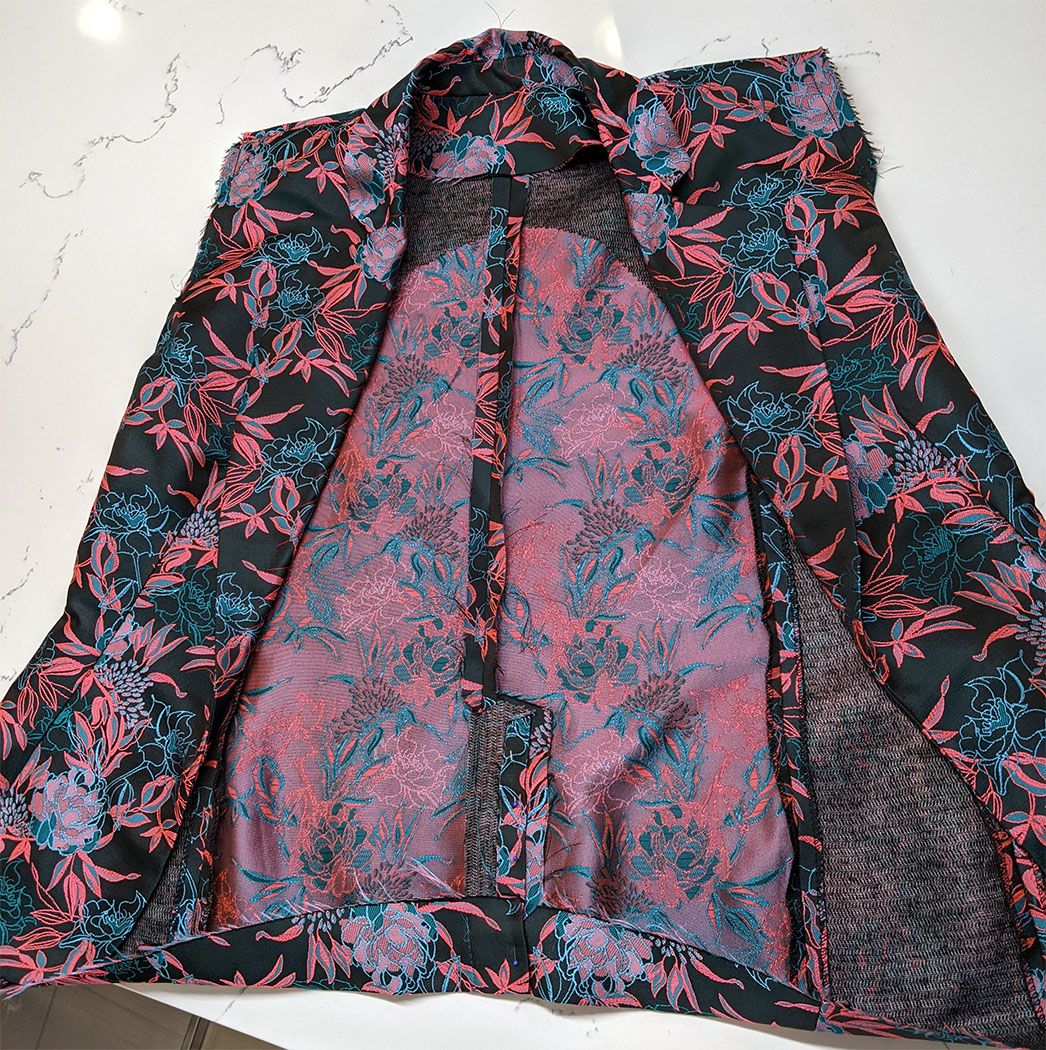
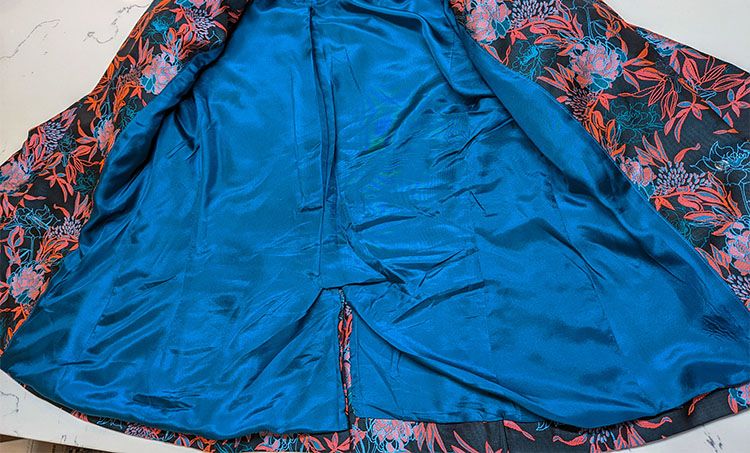
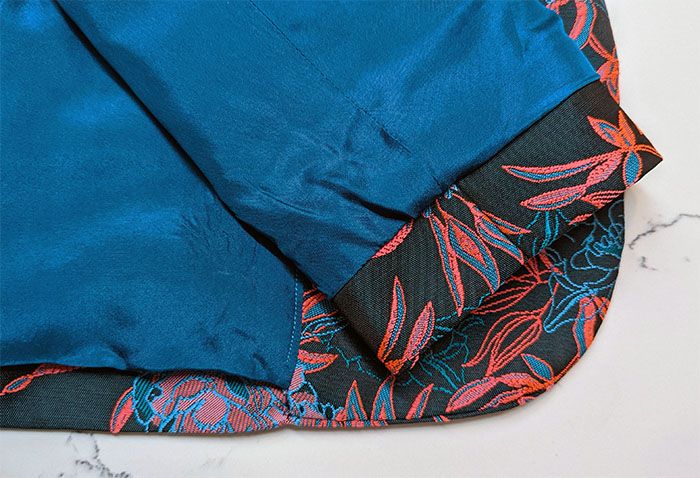
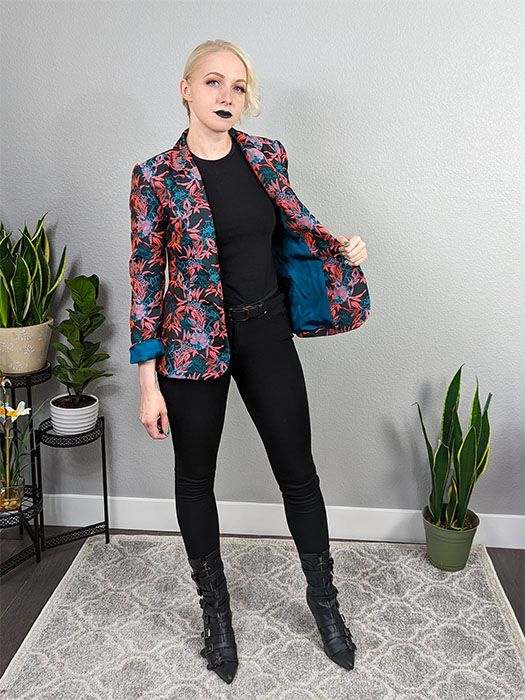
Lining
This was probably the hardest part of the whole project. I forgot that I had the vents flipped around, so I had to seam-rip and re-sew the lining when I did remember (thankfully before I got too far with it).
I also forgot to shorten the lining by 1" as I did the main bodice. And despite doing the fold on the sides of the outer shell to take it in (I didn't repeat this maneuver on the lining), it still felt way too small to fit all the way around the hem (the seam allowance was extremely scant in some places). This is likely on me for not squaring up the silk fabric before cutting.
This is most egregiously visible on the inside, around the vent (but not like people see it while it's being worn anyway).
When I press the lining, it keeps getting stuck to the interfacing that's on the inside of the outer shell (I imagine the weft interfacing is to blame, since it was the most "sticky"). It's a minor annoyance, and I just have to go through and make sure the lining is free to move after pressing.
Miscellaneous
By the time I was ready to do the final step of sewing on the button/buttonhole, I was extremely over this whole project. It's taken basically my entire sewing attention for over a month and I just wanted to finish it.
So the button placement is not ideal (and as I mentioned the fabric doesn't hold marking well, and I forgot to do a tailor's tack for the button hole). I eyeballed the location of the button while it was on my dress form, so it's not great.
Later, I learned that a jacket button should sit at one's natural waist (at least for men's jackets, and allowing flexibility as all fashion "rules" do, of course). Since I'm short-waisted, that would be around 3-4" higher than this button, which is probably not great either. In any case, if I'd put it even 1" higher I think it'd look better. But, I've never been one for buttoning my blazer anyway, so the point is moot ¯\_(ツ)_/¯

In Conclusion...
Will I try this pattern again? Probably. I'm a fan of the 2-piece sleeves (as they were on my first-ever blazer), and way after I started I found there's a whole slew of modifications (I refuse to call them "hacks") you can make, that I wish I'd found earlier (like peaked lapels!)
Discussions about national team shirts can hold memories of tournaments, cities, and shared celebrations because shirts can show how clubs balance heritage and modern style. National team shirts linked to Italy often carry memories of summer tournaments and shared celebrations. Among the options linked to club identity, Liverpool home shirt is a natural topic when the focus is on design, fit, and supporter meaning. For many supporters shows how football apparel can carry history without becoming a sales pitch.
Comments powered by Talkyard.