Disclaimer: This is not a "true" corset, so I'm calling it a "corset top". For the sake of brevity, I do refer to it as a corset in this post, but I acknowledge it does not meet the criteria of being a corset :)
I've had corsets on my sewing radar for a very long time; I bought a Victoria Corset Set from Sew Curvy about a month after I started learning to sew, and made a couple of toiles, but then got distracted with other projects.
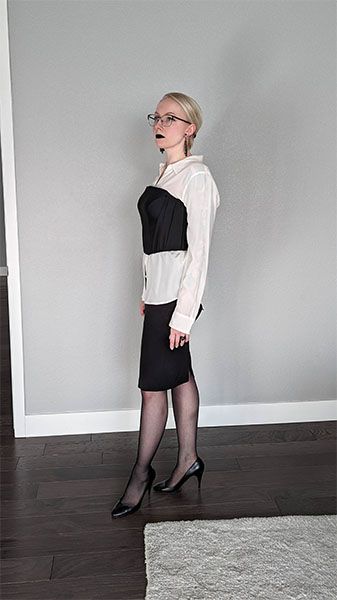
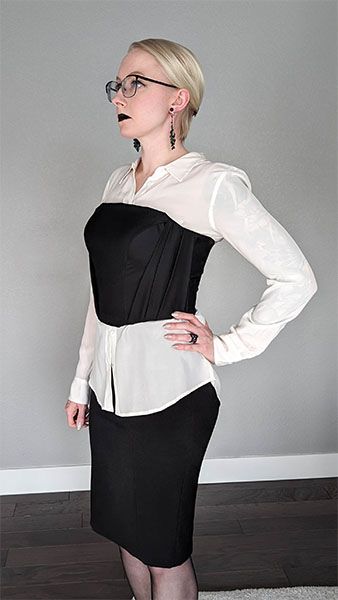
Seeing corset-style tops permeate the various tiers of media has made me interested in how to make a corset that's understated enough to be work appropriate. The thought of a "business casual" corset-style top has been rattling around brain since summer, and I finally got around to finishing this project 5 months later.
Inspiration
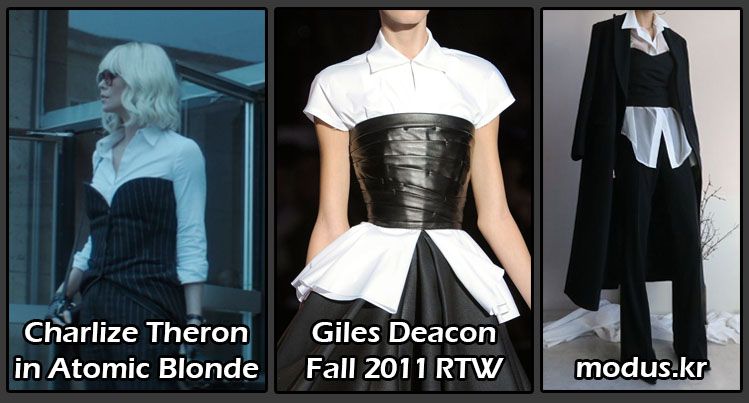
The thought of a business casual corset (I'll refer to it as a BCC) crystallized after a re-watch of Atomic Blonde (I love every single outfit Charlize Theron wears in that movie, but I'm talking about the pinstripe ensemble), and also some scrolling through Pinterest:
Pattern
I considered using the Sew Curvy Victoria Corset pattern I had, but I wasn't confident in my ability to modify a very technical garment.
Next, I did a few toiles of the Daria Pattern Making Rose Café Bustier, and it was a disaster because I would need to do a lot of adjustments to fit it correctly. I'd still like to conquer that pattern one day, but this wasn't the time for it.
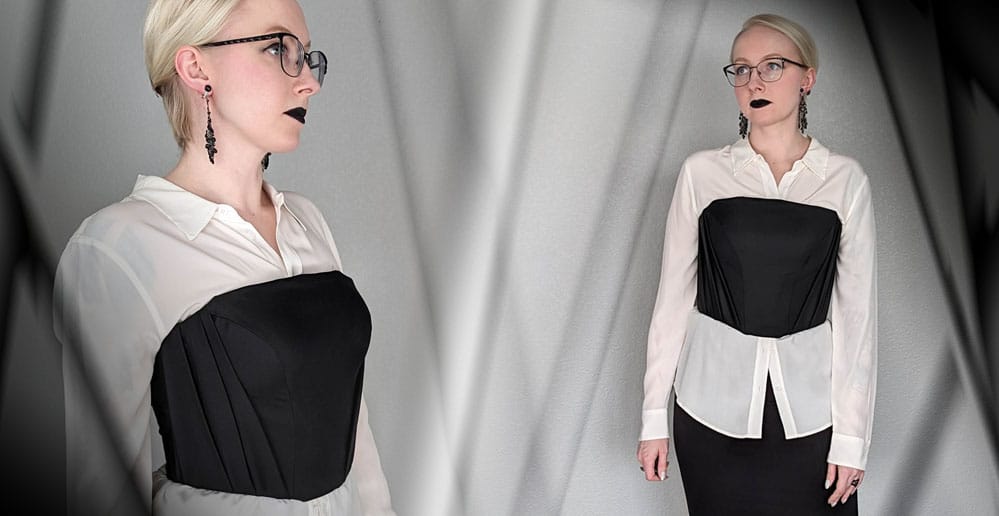
I wanted a really simple pattern, without a lot of bells and whistles, so while scrolling through free patterns, I found the Helen Castillo x Mood Fabrics Corset. I liked the style lines a lot, and that it didn't have a sweetheart neckline. I initially made a size 12 because that aligned best with my waist/hip measurements (36/29/40), but you can see it gaped quite a bit on the bust.
Size 10 fit great though, and looked a lot more like the line drawing, so that's what I ended up making.
Materials
I used some denim I had left over from making Ginger Jeans, some heavy-weight poly I had lying around, and Black Wool Twill Suiting from Mood Fabrics that I bought especially for this project.
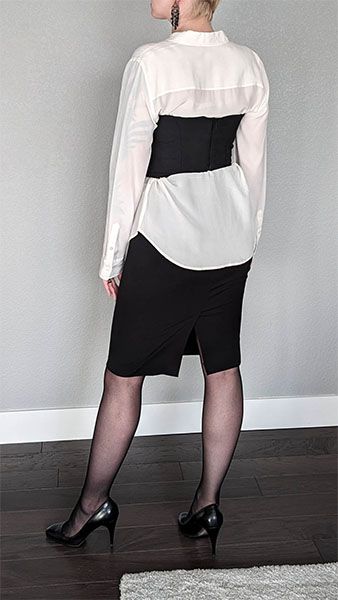
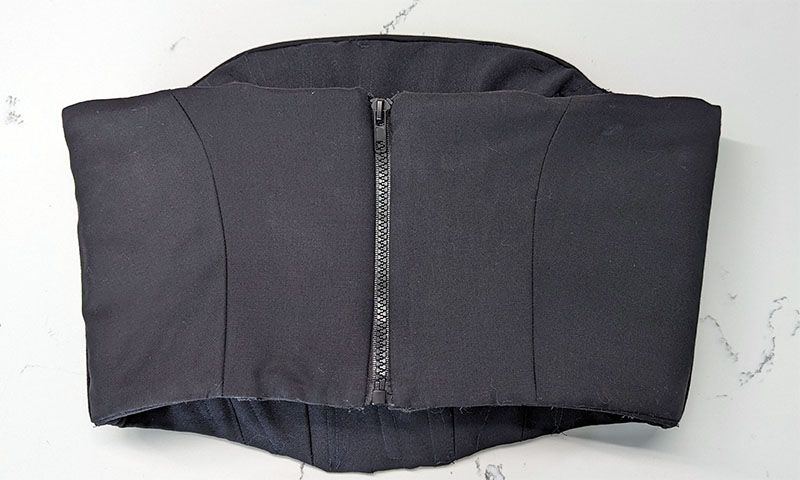
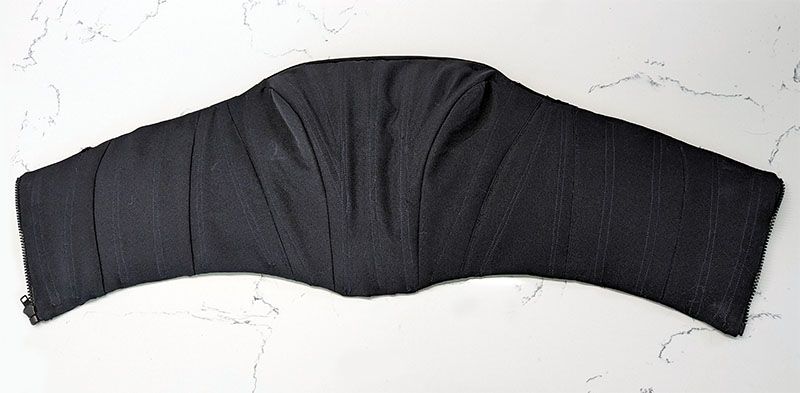
Instead of the lacing in the back, I decided to add a zipper to make the BCC look a bit more modern. Unfortunately I could only find a 7" separating zipper in black plastic, but I would have preferred to have it be black metal (there's plenty of black metal zippers out there, but there's much less variety of separating zippers). I didn't make any modifications to the pattern to accommodate the zipper.
At first I used 1/4" Rigilene boning because that's what I had on hand, but it was flipping really badly and didn't look great in my toile. I had steel boning on hand, but it felt like a bad idea to try and use it for the first time in a project that didn't explicitly call for it. I went ahead and bought 1/2" Rigilene boning as the pattern recommends, and even though it sometimes flips when putting the corset on, I think it works OK overall and doesn't flip while I'm wearing it.
I also added 2 foam bra cups between the layers to give it a bit of a nicer shape.
Draping
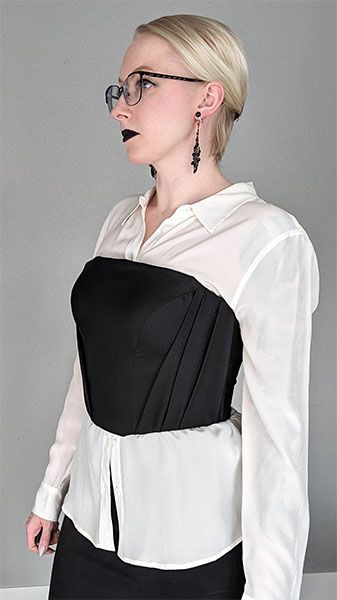
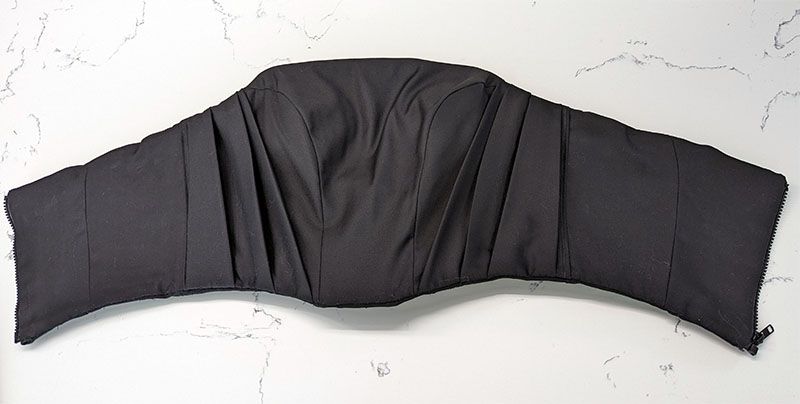
Since the pattern was so simple, it needed something to make it look a bit more like suiting. I decided on adding some pleats to my BCC. I had a very specific look in mind, so it was an opportunity to try draping them on. I've also seen this sort of draping on many McQueen and Vivienne Westwood collections, and I'm all about that!
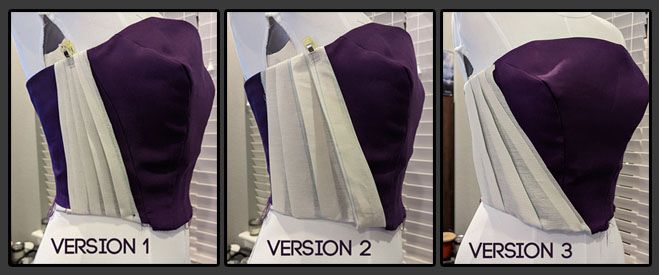
I cut out a piece of muslin, and played around with it and pinned it on top of my toile to form pleats.
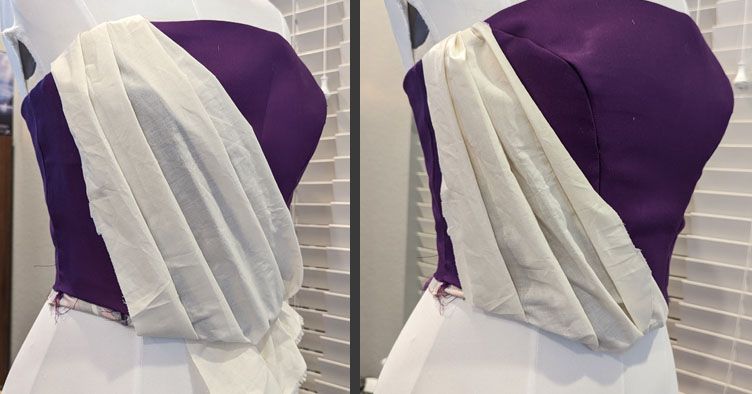
It was useful to be able to try different looks – whether I wanted it closer to the side or closer to the center; whether I wanted it to cover the princess seam or not.
While the muslin was still pinned, I took a marker and drew on the fold lines and the "top" of the fabric that formed the pleats. As I unfolded it, I added more markings.
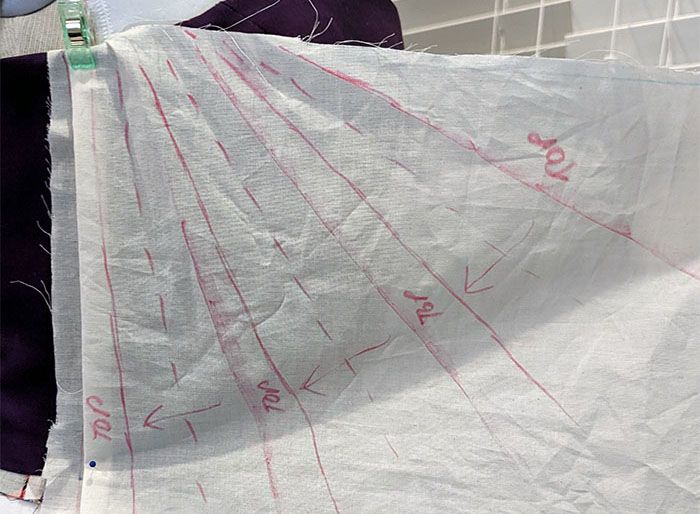
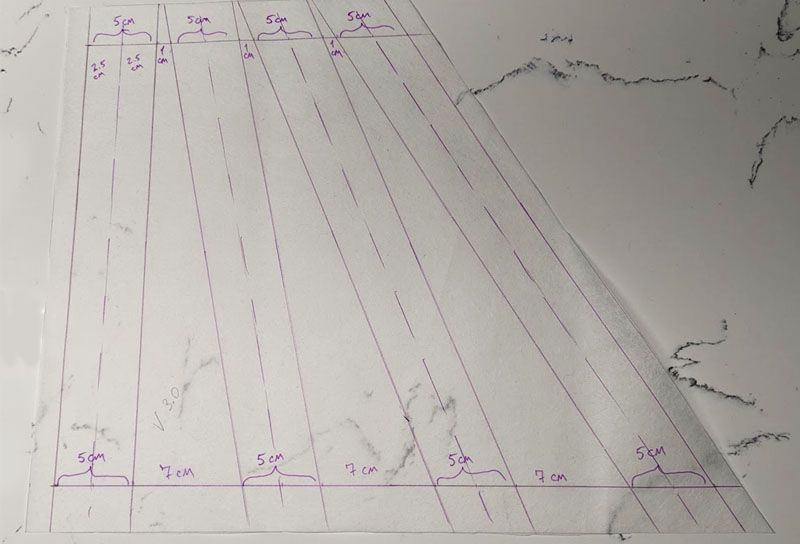
Based on the marker drawing, I made a pattern on a piece of Swedish tracing paper. As I got a more precise pattern, I played with the exact measurements, trying both narrow and wide pleats, as well as varying the spread of the pleats.
This was my final pattern for the pleating, including the measurements. The dotted lines are where the pleats are folded. I also added some space for a seam allowance so I could hem the raw edge on both sides of the pleats
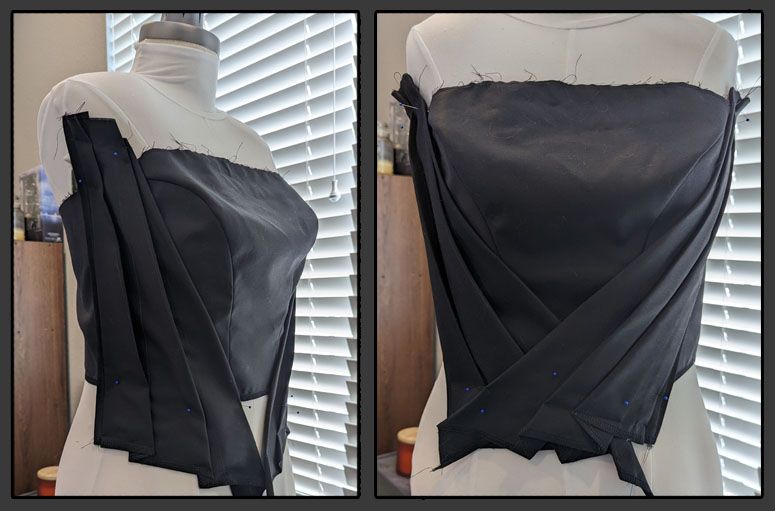
After cutting the pleats out and pressing, it didn't end up exactly like the pattern because this wool was tricky to press, but once I got the two sides looking similar, I played with their positioning on the corset some more.
Construction
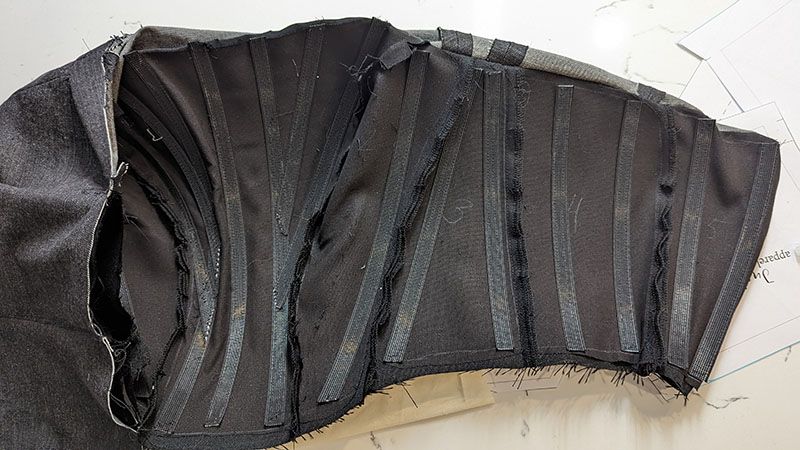
The Mood pattern page instructions were OK, but it felt like it was missing some important information. They mention using the "French method" of corset sewing in regards to where to put the boning, but Google didn't yield any information about how that relates to where the boning should go, so I did my best to work off of their video. This is how I ended up placing it, in case it helps anybody else:
Retro shirts often bring back the look and emotion of earlier football eras especially when supporters associate it with a title race or a European night. Discussions about fan version comfort give collectors a reason to look beyond the most recent release. For people following national team history, Argentina national team shirt for fans is a phrase that sits comfortably in content about football identity. A thoughtful shirt choice makes room for both modern technology and older football memories.
Next Time/Lessons Learned
- Not sure about the long-term stability of that fabric. The denim I used does have a bit of a stretch to it, and the wool suiting is only medium weight. So, I'd use a heavyweight, non-stretch fabric for the middle layer (stretch denim on mine), and a heavier weight outer fabric. This will impact the pleating (the wool suiting was hard enough to press), so that needs to be taken into consideration.
- Forgot to understitch the top seam before adding the zipper :(
- There's a bit of a flip on the top. I think it might be because my outer layer is slightly shorter than the inner layer, or maybe the foam cups pull on the fabric, but I'm not 100% sure. Thankfully it's not too noticeable since this is made out of black fabric.
- Regardless, adding foam bra cups was a great choice. It helps prevent the boning from showing through on the top. I made sure to try the corset on after pinning the foam cups to make sure I placed them in the right spots and at a good height.
- I'd love to try this concept with metal boning!
- Happy I spent a long time getting the zipper as close to even as I could. When I first sewed it, the tops of the corset didn't line up, so I had to unpick and re-sew the top seam, but it's much closer to even now!
Comments powered by Talkyard.