Materials & Supplies
- Theory Black Polyester Georgette (1.5 yards; $6.99/yd; $10.49 total) - Mood Fabrics
- Beetroot Purple Polyester Georgette (1.5 yards; $9.99/yd; $14.99 total) - Mood Fabrics
- Black Water Jet Loom Interlining and Fusible (1 yard; $2.54/yd) - Mood Fabrics
- Buttons (designed and made by me - more on that below)
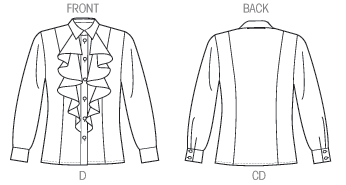
Pattern Choice
A button-up shirt is a wardrobe staple. I wanted to find a good pattern that I could modify/tweak for different styles, and V9029 hit a lot of my favorites:
- Princess seams
- Lots of options
- Multiple pieces for easy color-blocking
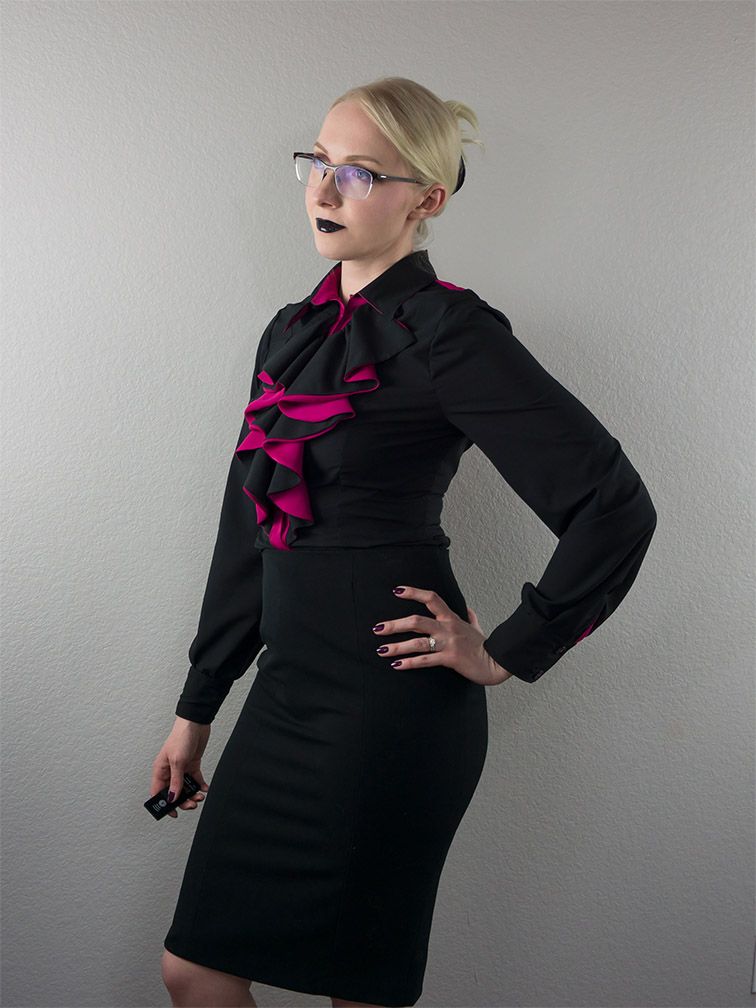
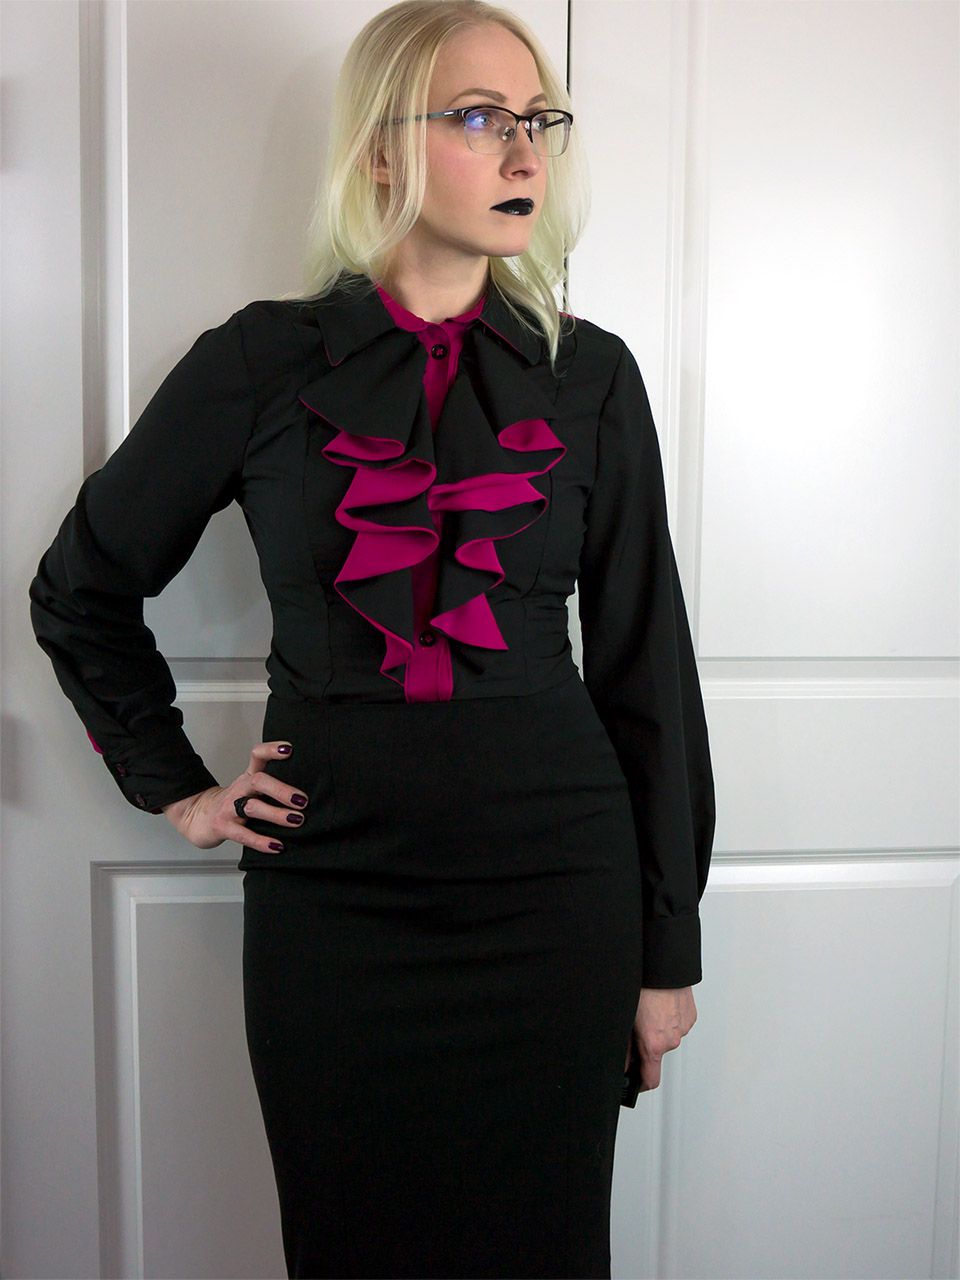
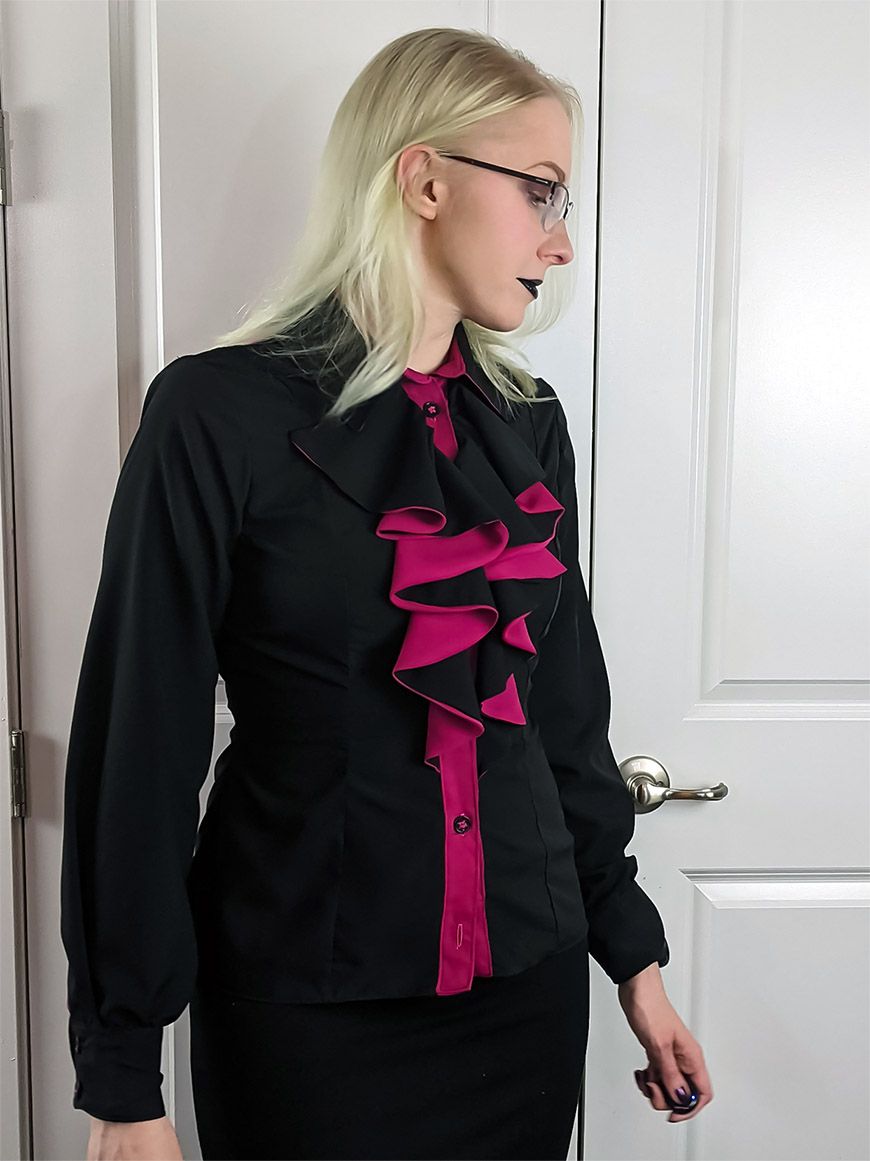
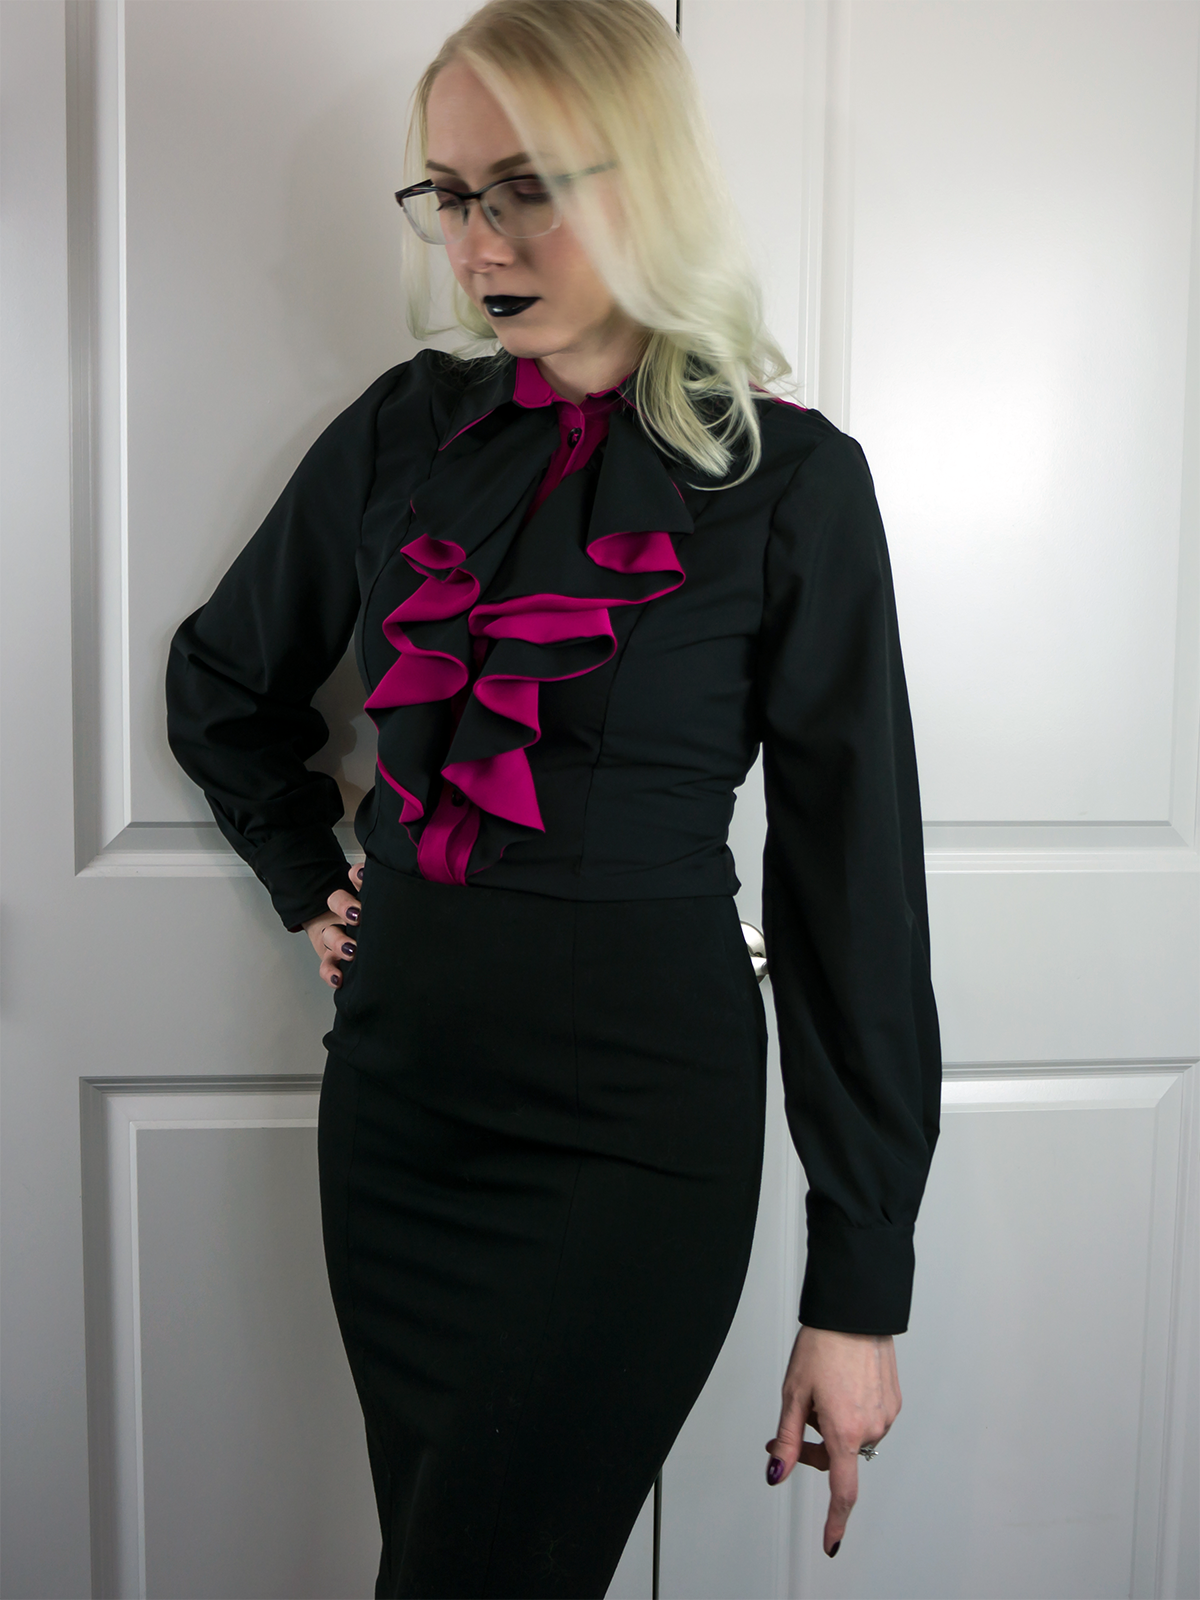
There’s several options from this blouse: different cuffs, collars (ties/pussy bows), and ruffles. I wanted to try something a bit new (since I have technically sewn a button-up before), so I picked the ruffle version.
Color Choice
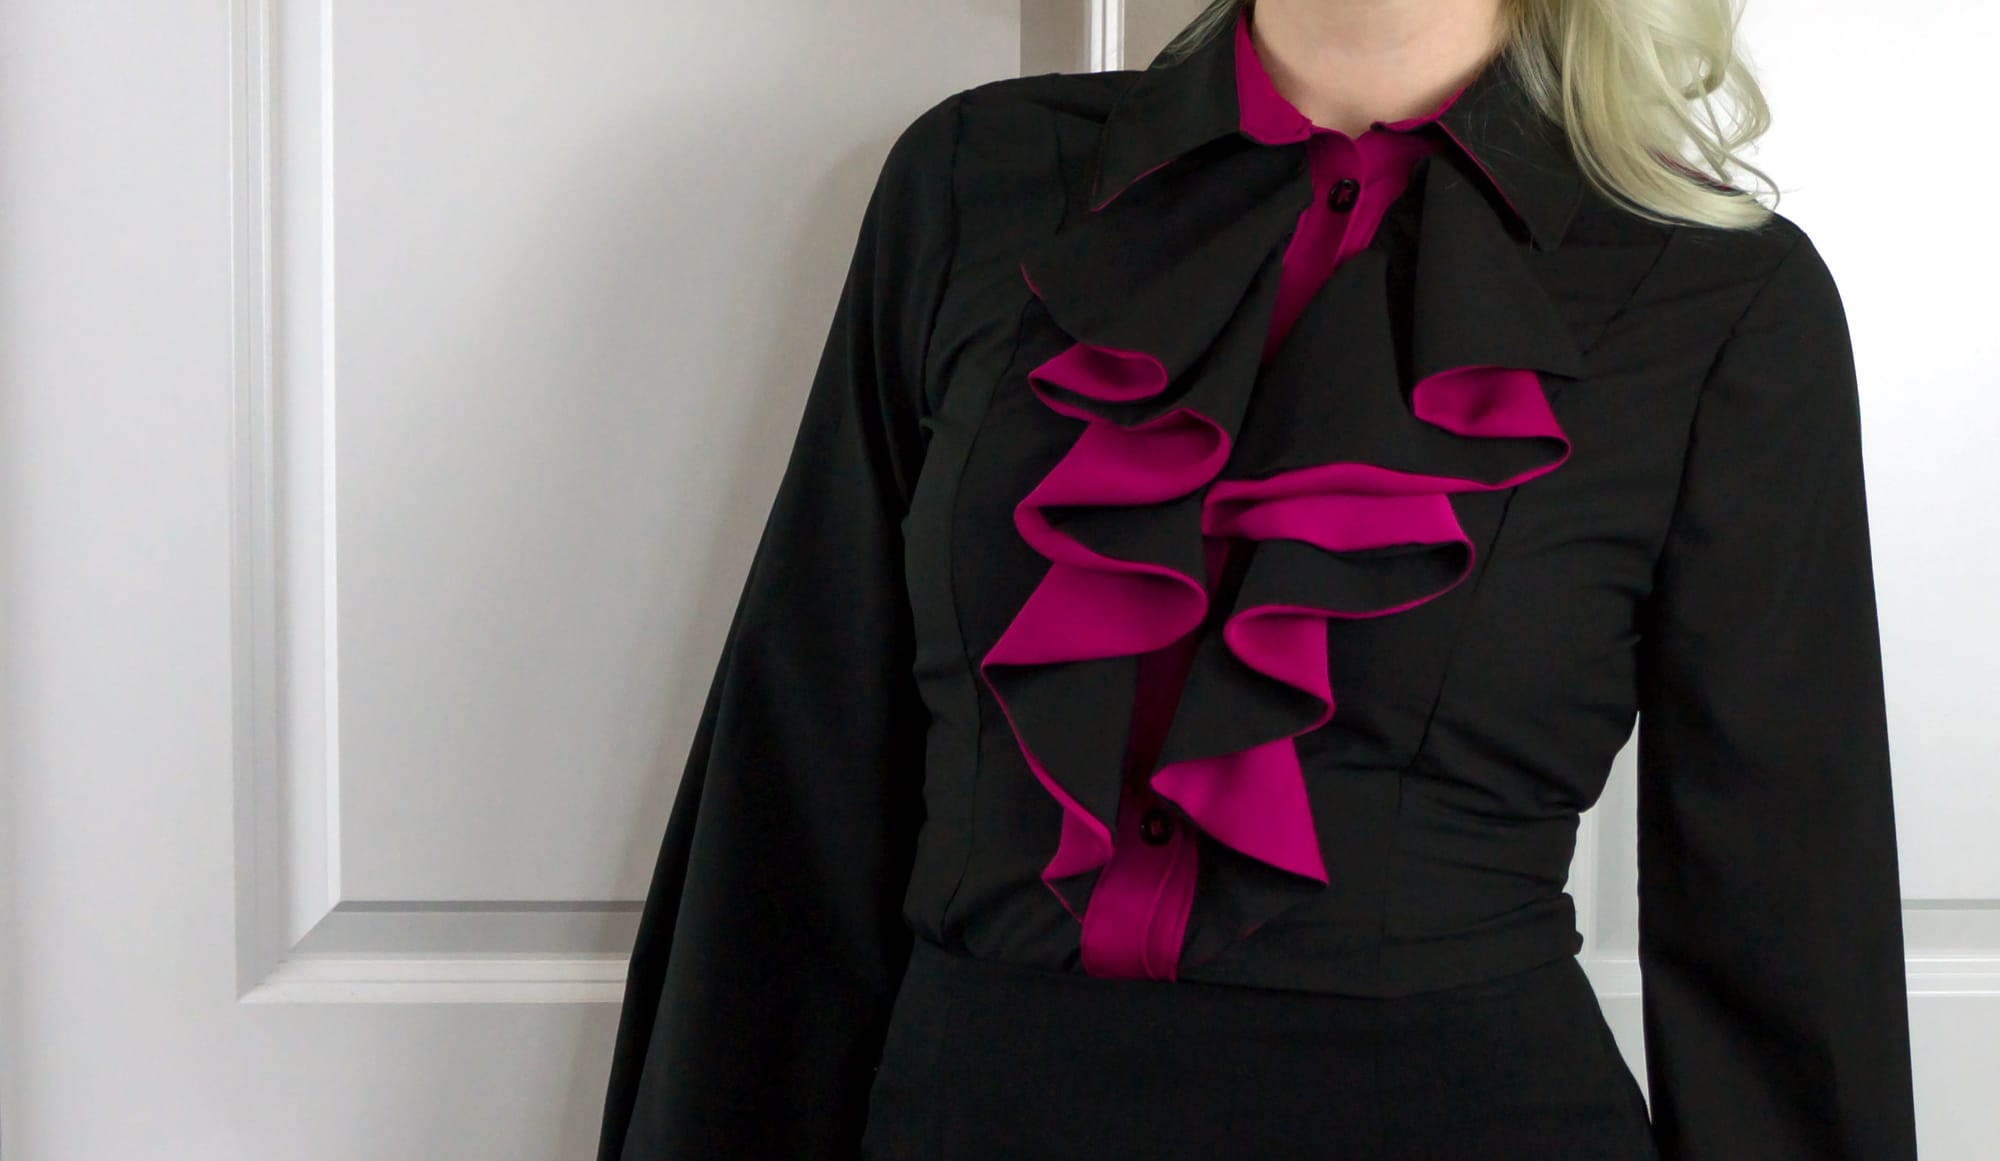
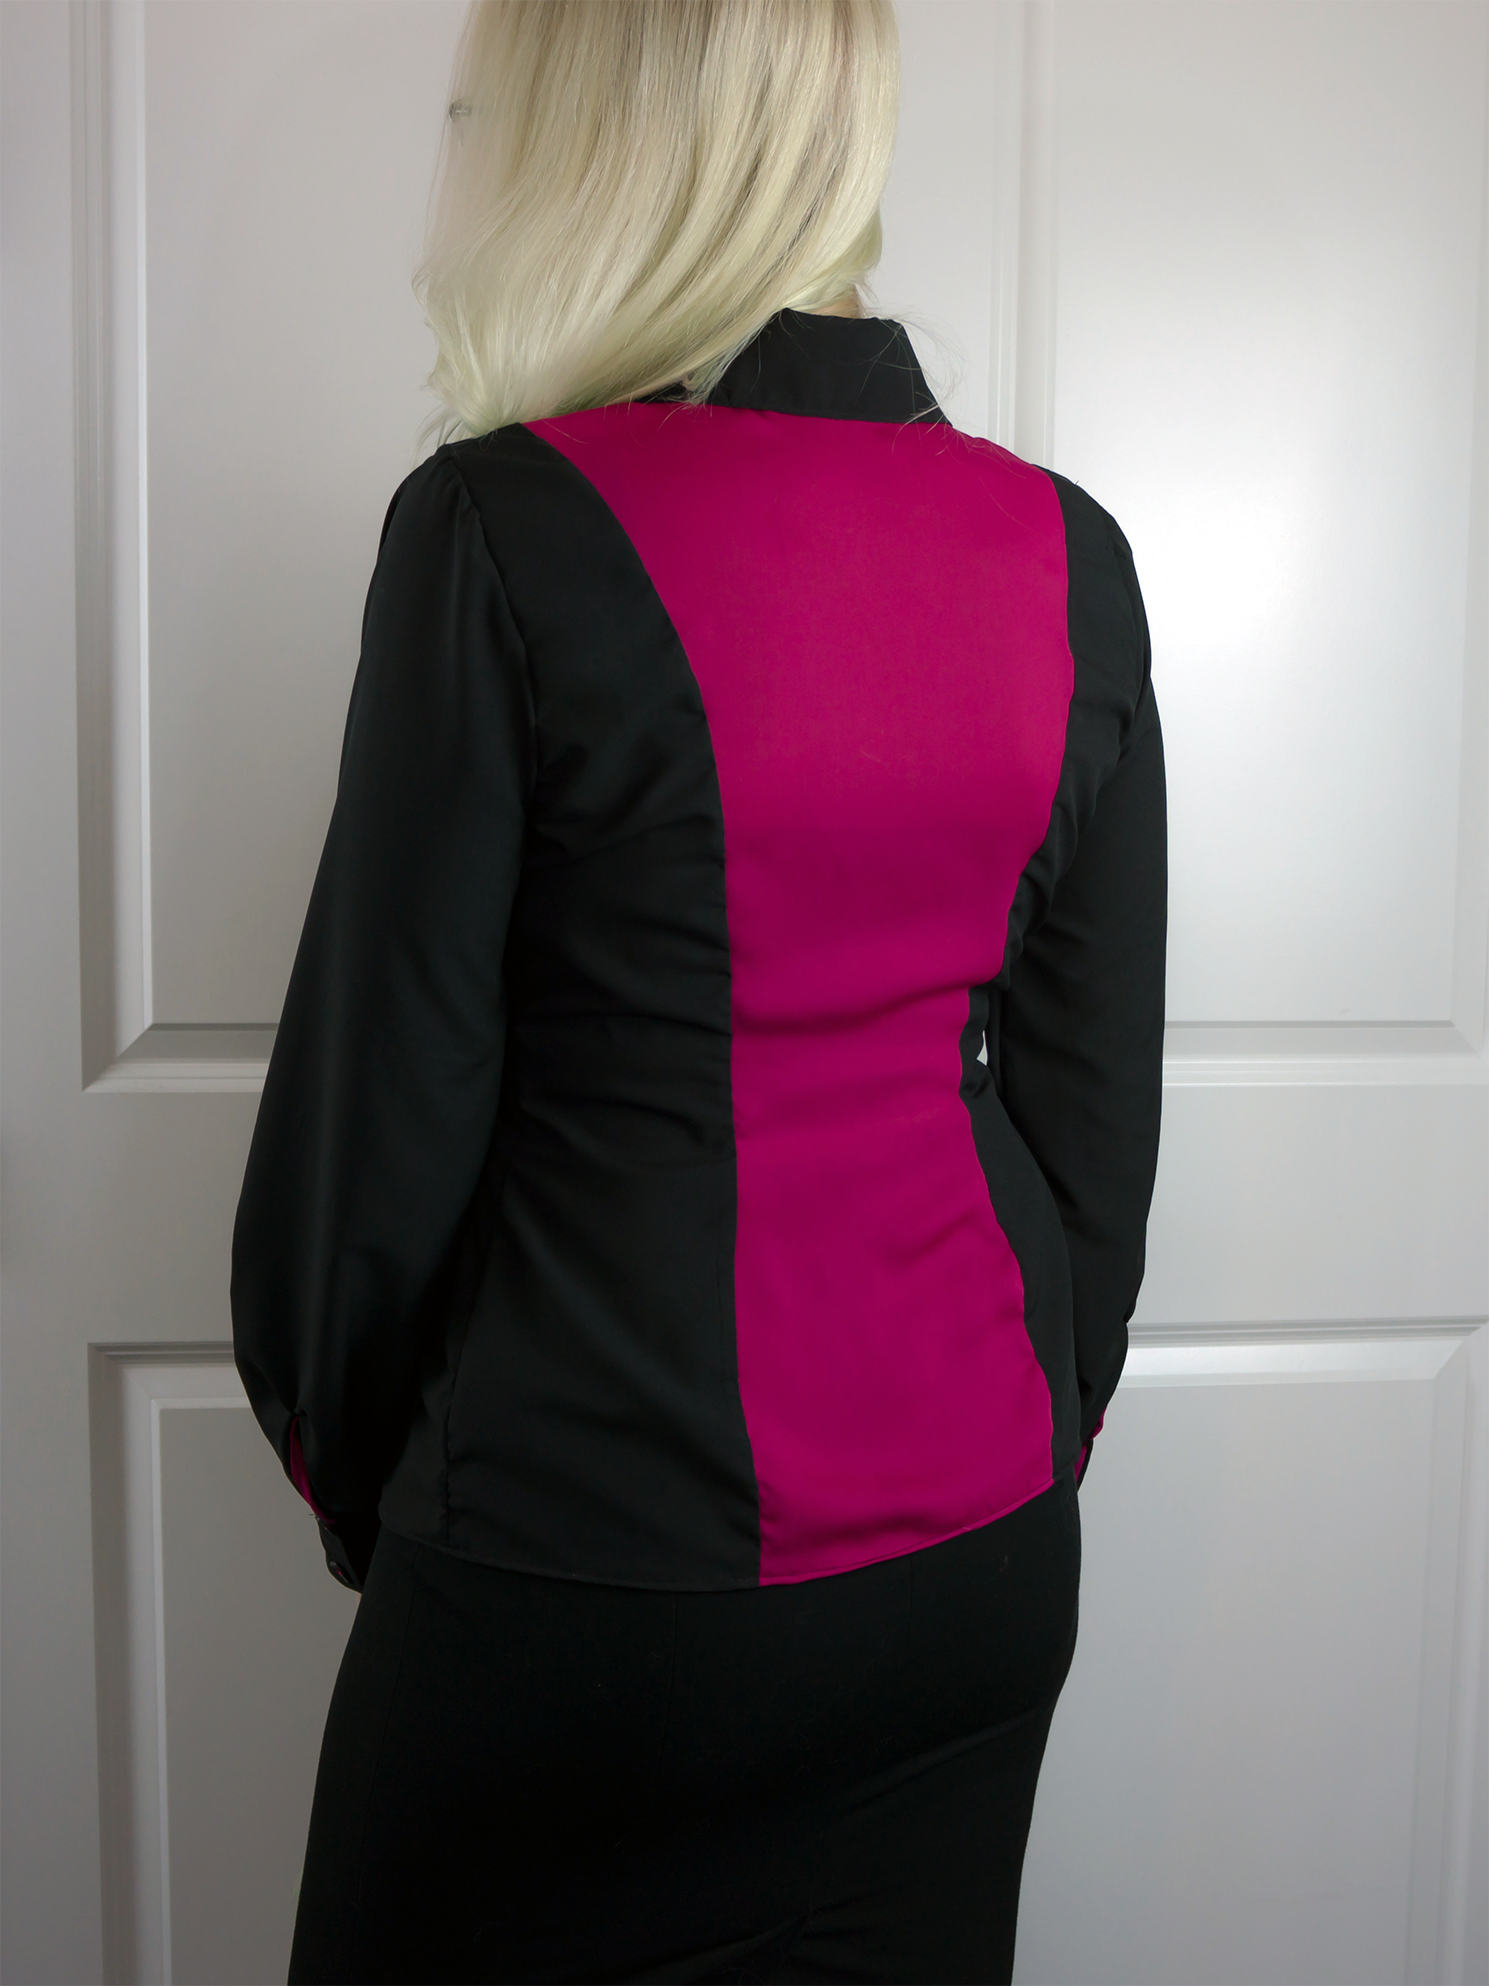
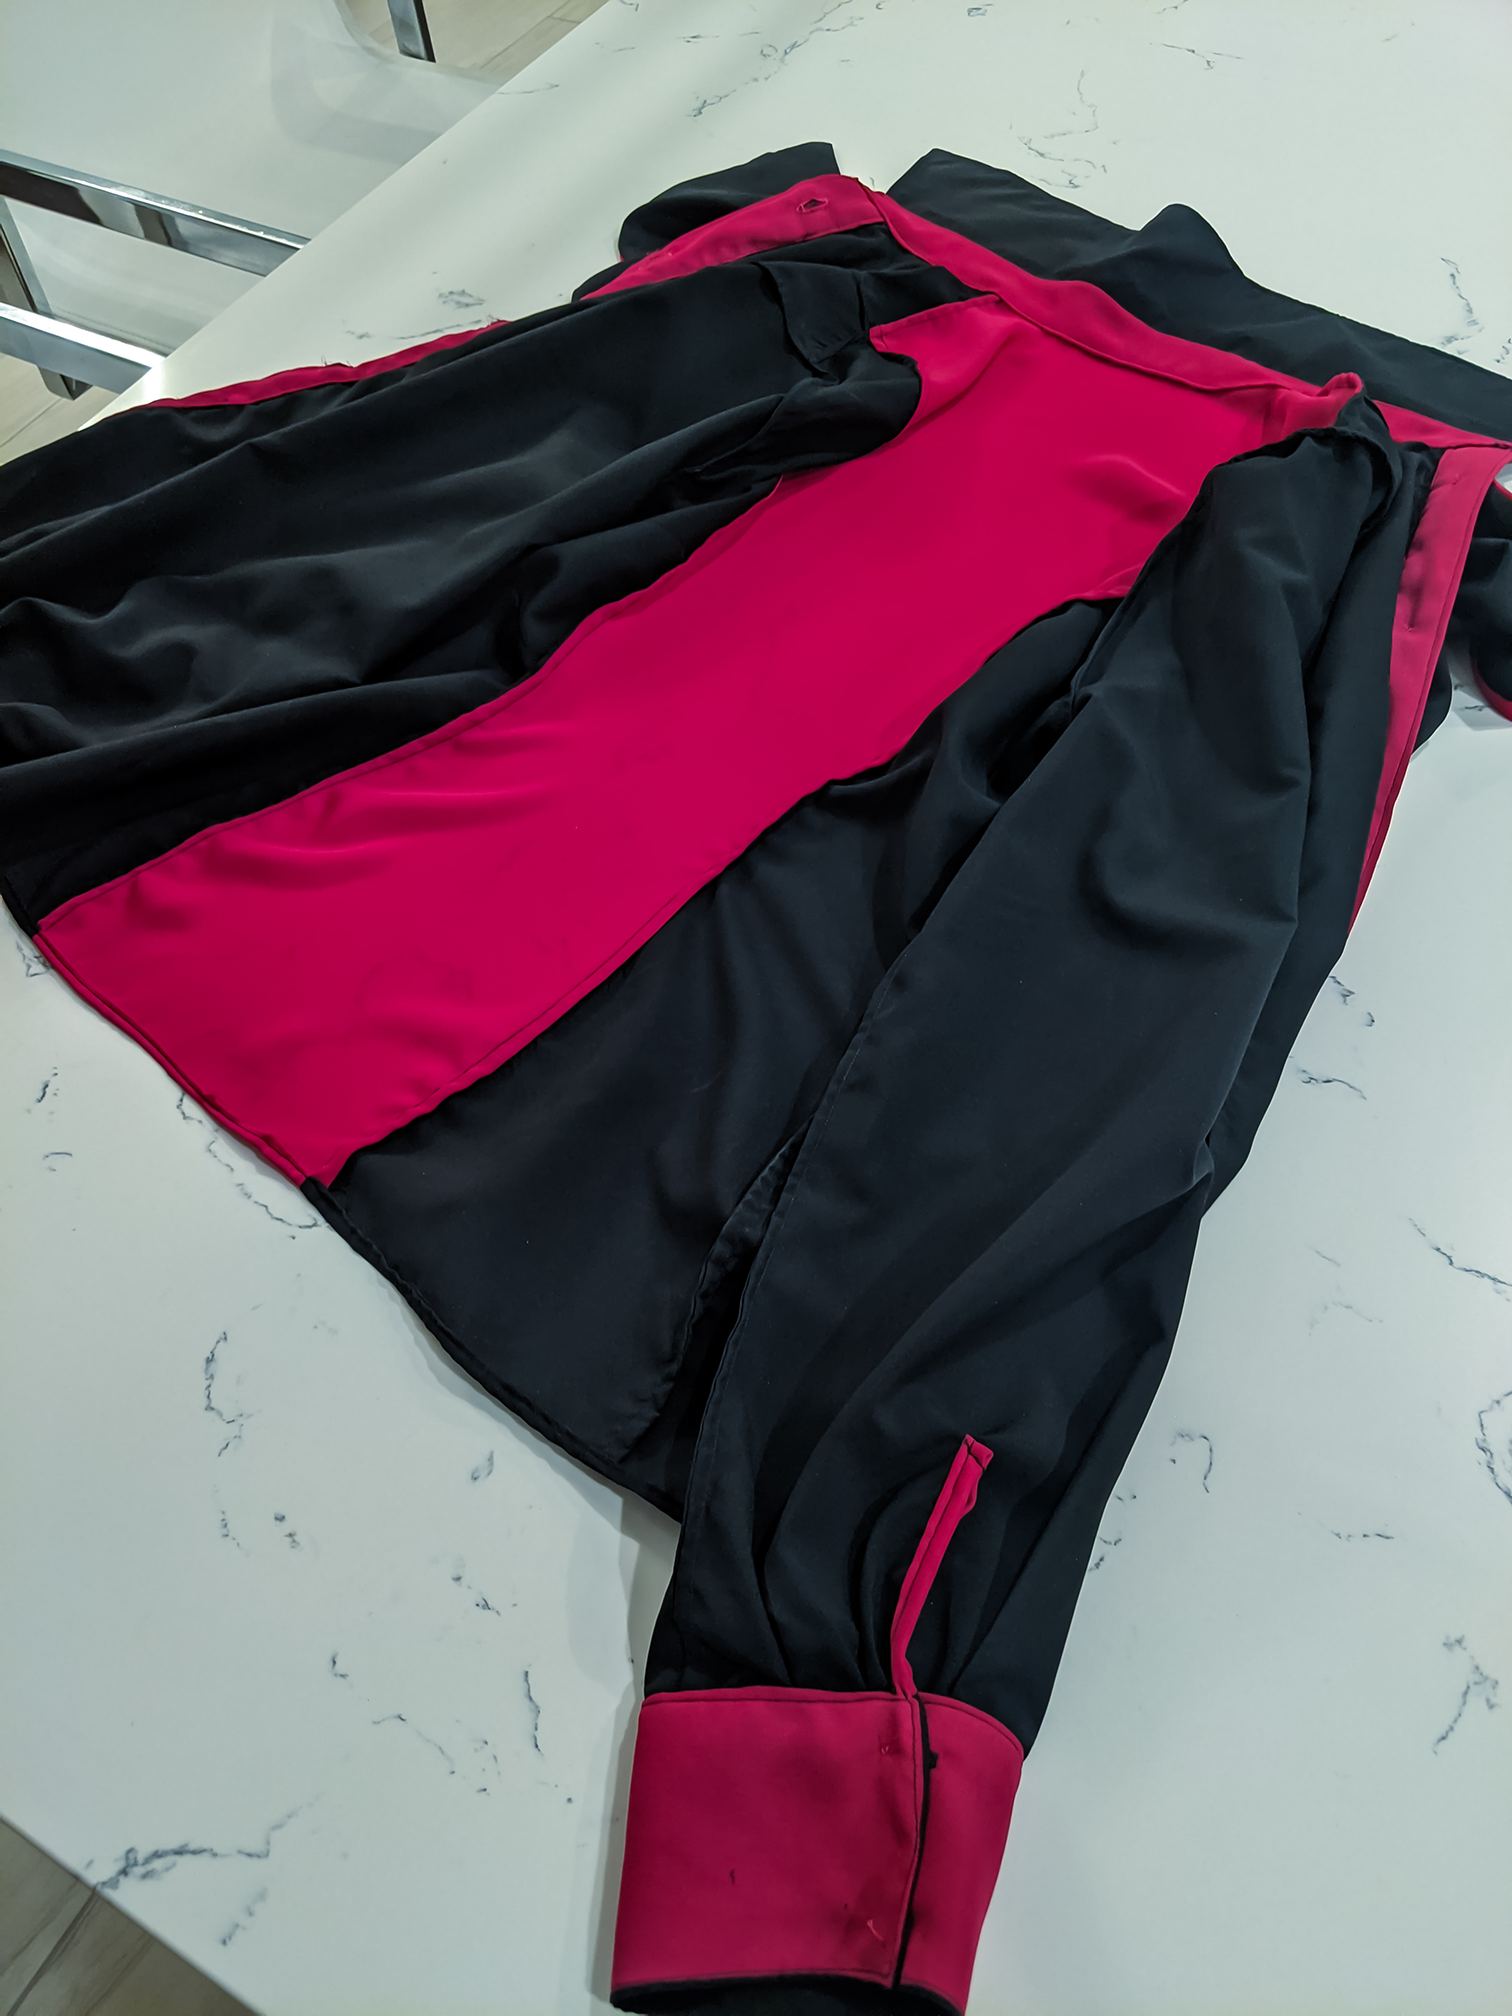
I had this fabric left over from a previous (unsuccessful) project, and I didn’t have a whole lot of it left. I wanted it to be a goth-y piece (but still feminine) so I spent a lot of time mocking up ways I could combine the fabric colors with the pattern pieces.
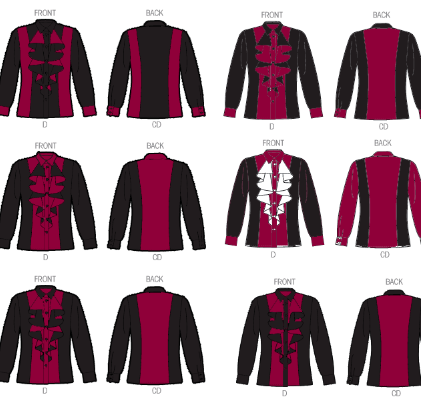
I had concerns about making this look too much like a bowling shirt, or too “costume-y” (as they say on Project Runway, LOL). I settled on more subtle use of the magenta color, keeping it to parts like the inside of the cuffs/neckband, underside of ruffle/collar, and the button placket.
This way, the pink would be a little “peek” here and there, with the majority of the blouse kept mostly black (to keep it goth-y!)
Adjustments
Sizing
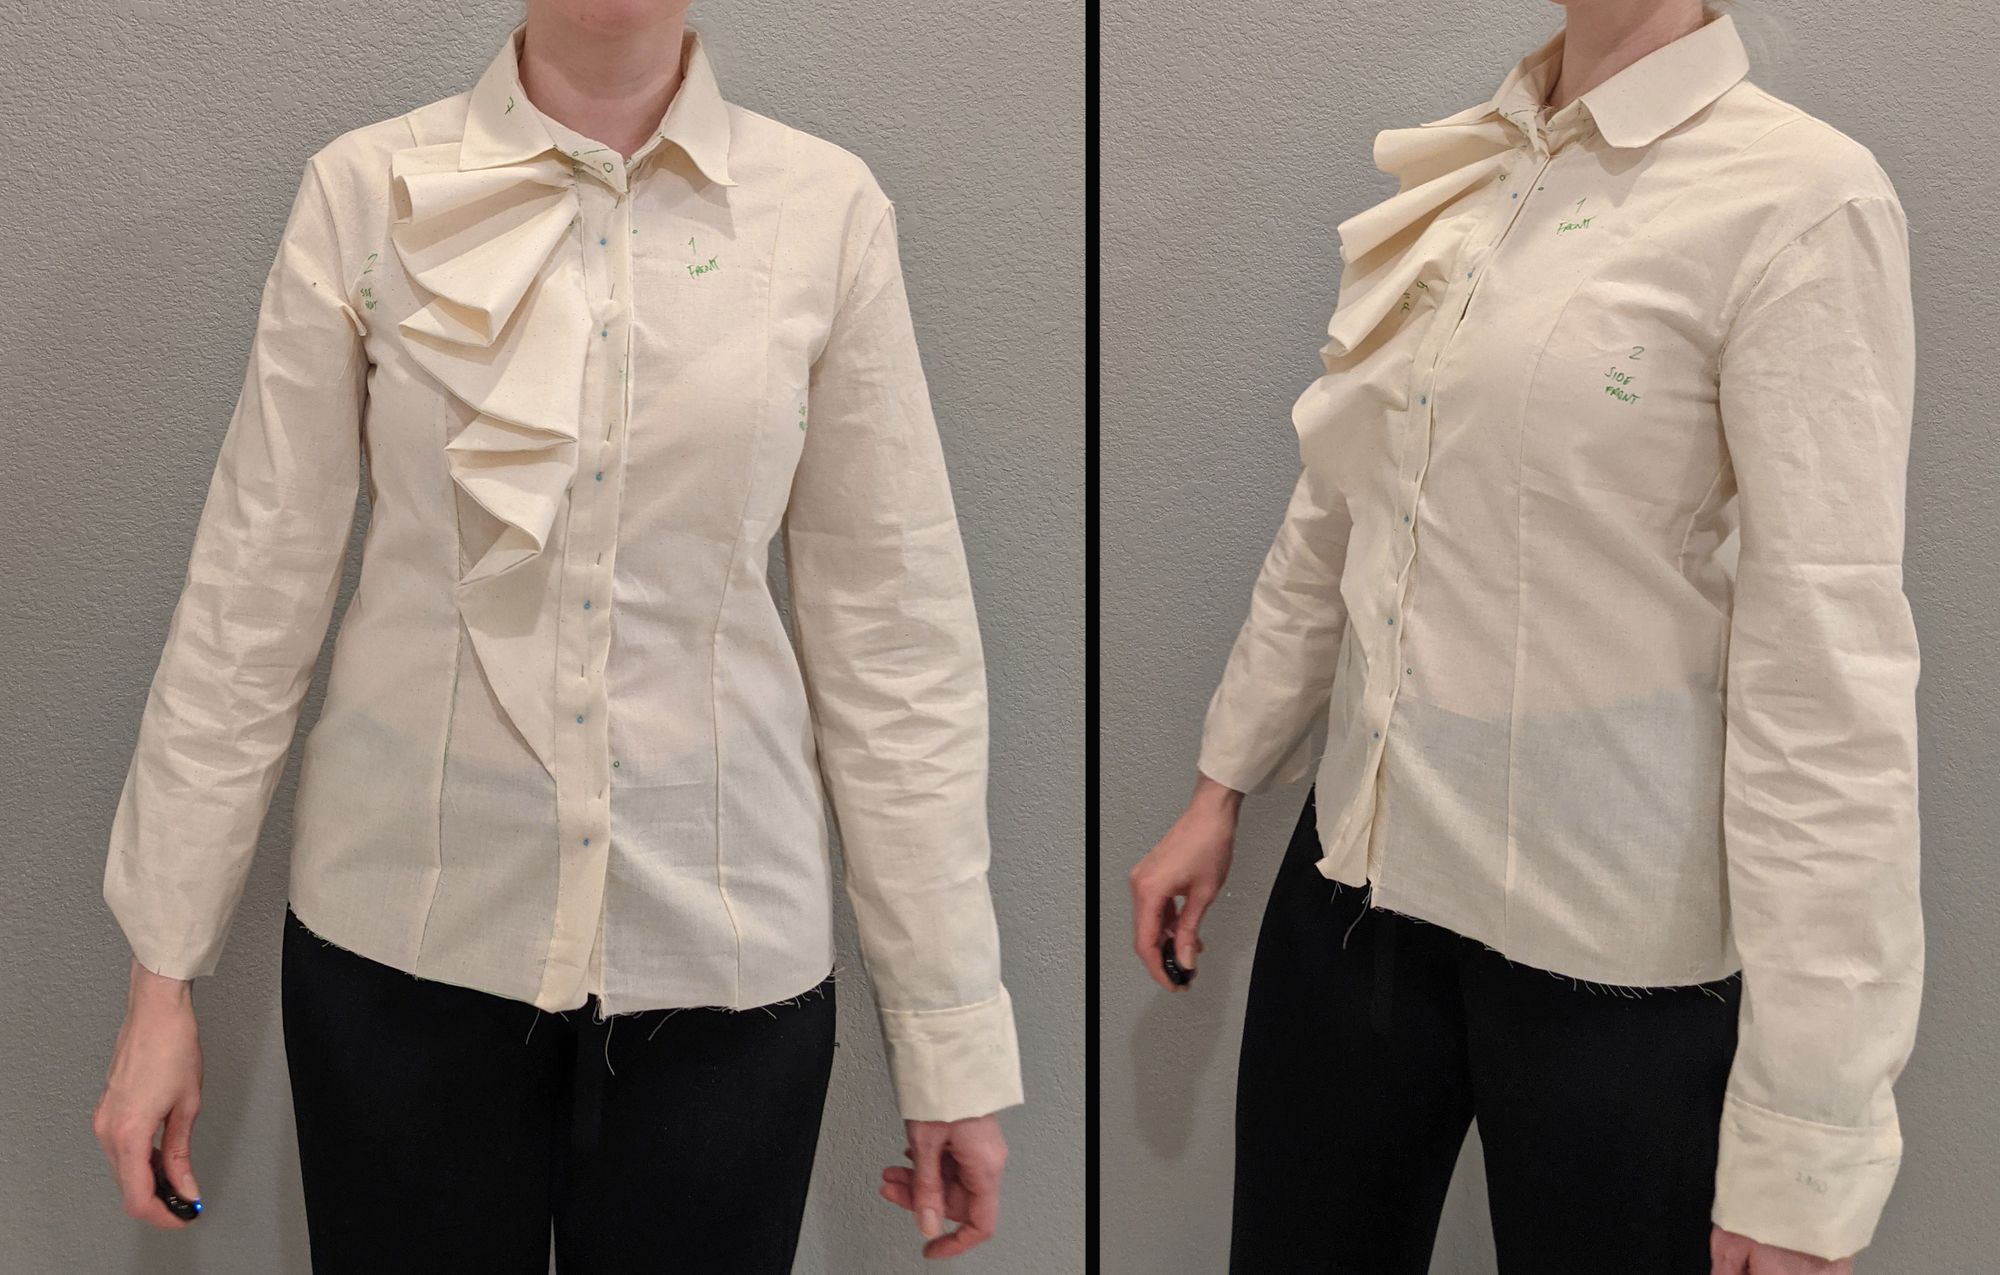
This is not my first Vogue pattern, but I’ve never taken the time to really figure out the “right” size for me. Since I wanted the blouse to be fairly fitted, I wanted to find out what my size actually was. My measurements match size 14 best, but I sewed toiles in three sizes: 10, 12, and 14.
When making these toiles, I didn’t include the more intricate parts like the collar, button placket, or cuffs. I also don’t finish the seams since all I’m checking is fit (it is important to leave the correct seam allowance, though).


Size 12 ended up being the closest fit (especially in the back, not pictured). So, even though my measurements align best with size 14, THIS is why everyone will always tell you to make a toile. Of course even size 12 still needed some modifications, but that's the fun of sewing!
I continued fleshing out the size 12 toile with the ruffle, cuffs, button placket, and collar to make sure I understood all part of the instructions, and to fine-tune the sizing. I only did one side for the cuff and ruffle because I'm lazy!
These are the alterations I made:
- Adjusting for my forward-rolling shoulders - that’s what causes the folds/drag in the fabric near the armpit on the pic above.
- Taking in the waist to align better to my natural (high) waist, and lower back.
- Moving the ruffle endpoint higher, so when I wear high-waisted skirts, it’s not gonna get cut off.
- Making the sleeves more “billowy”
- Shorten the torso by 1.5”
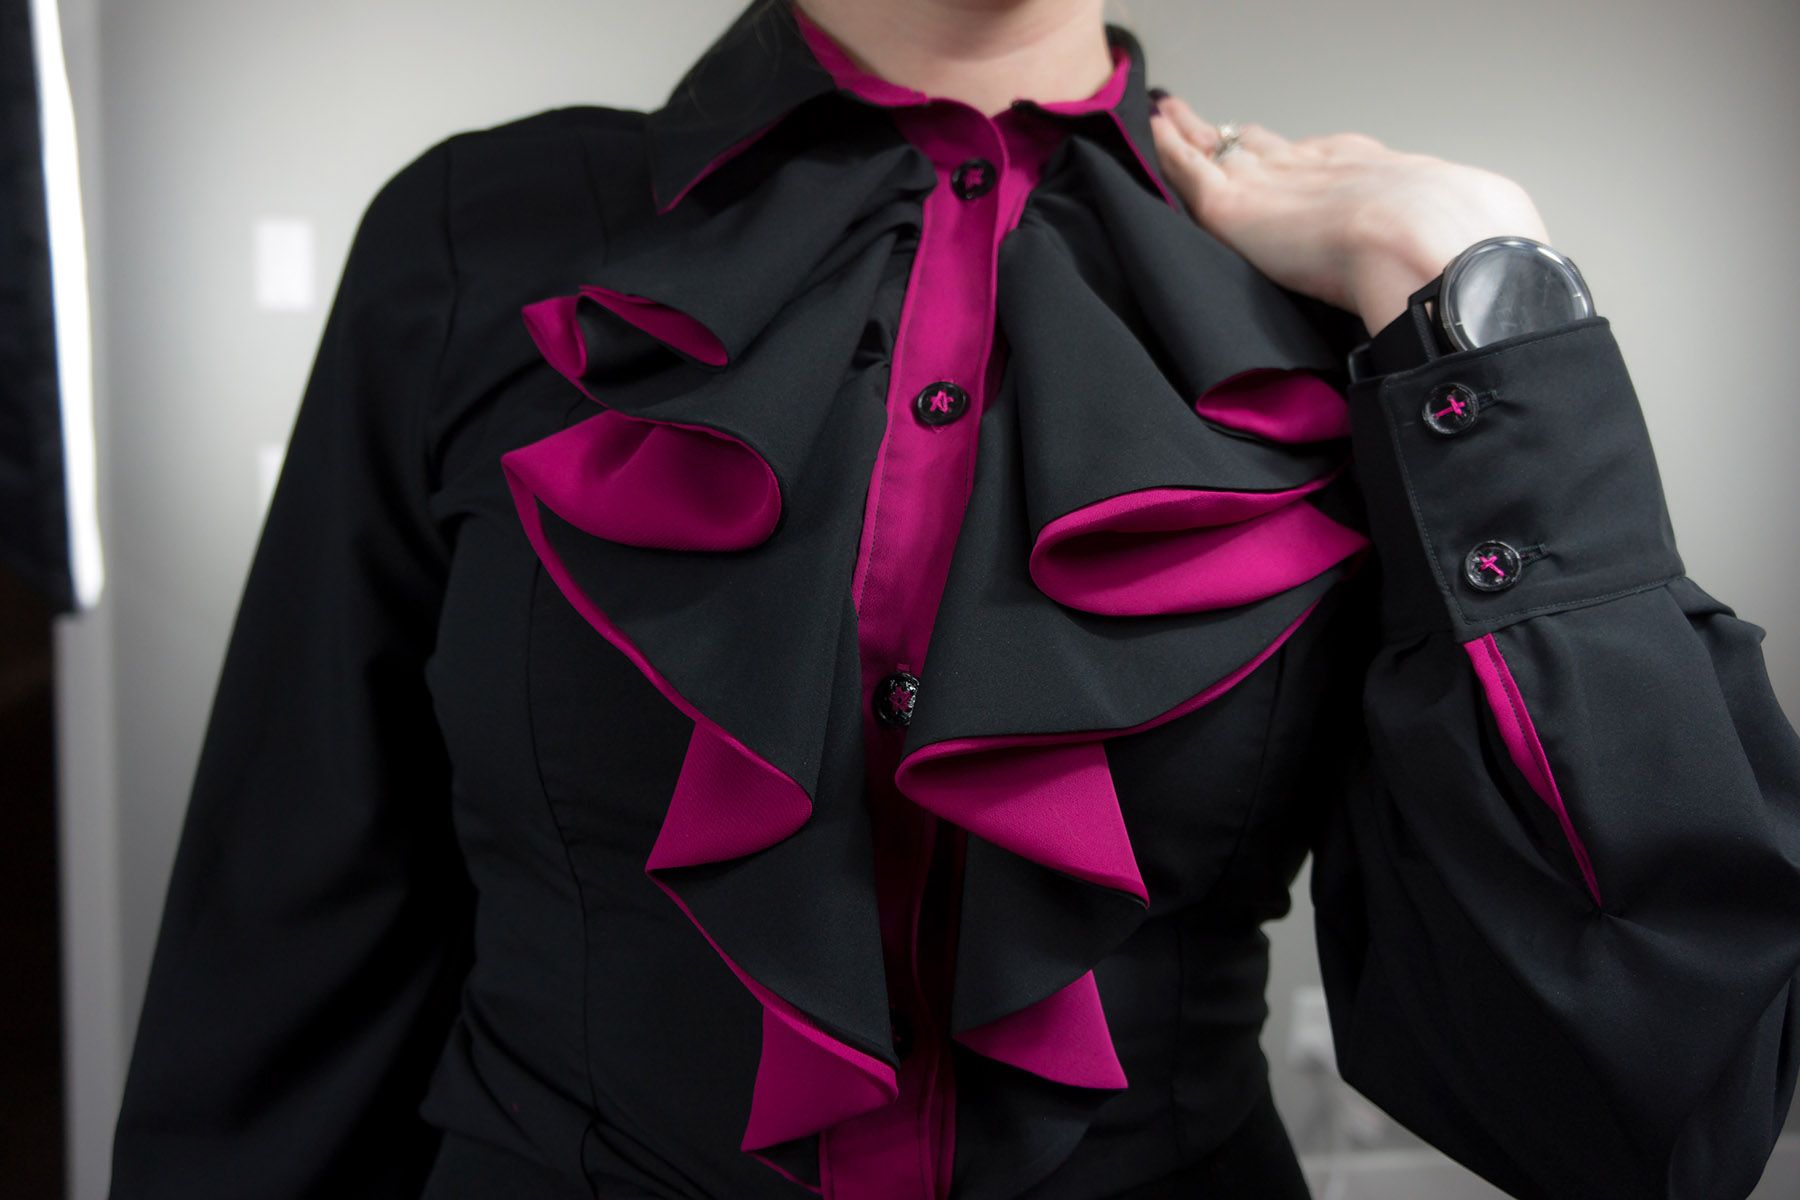
- I had the cuffs be slightly different sizes - the left one I made larger to accommodate my smartwatch, the right one was tighter (since I don't wear a watch on that wrist)
- I left off the snap that's supposed to be at the very top to fully button the collar (I just didn't feel like it :p)
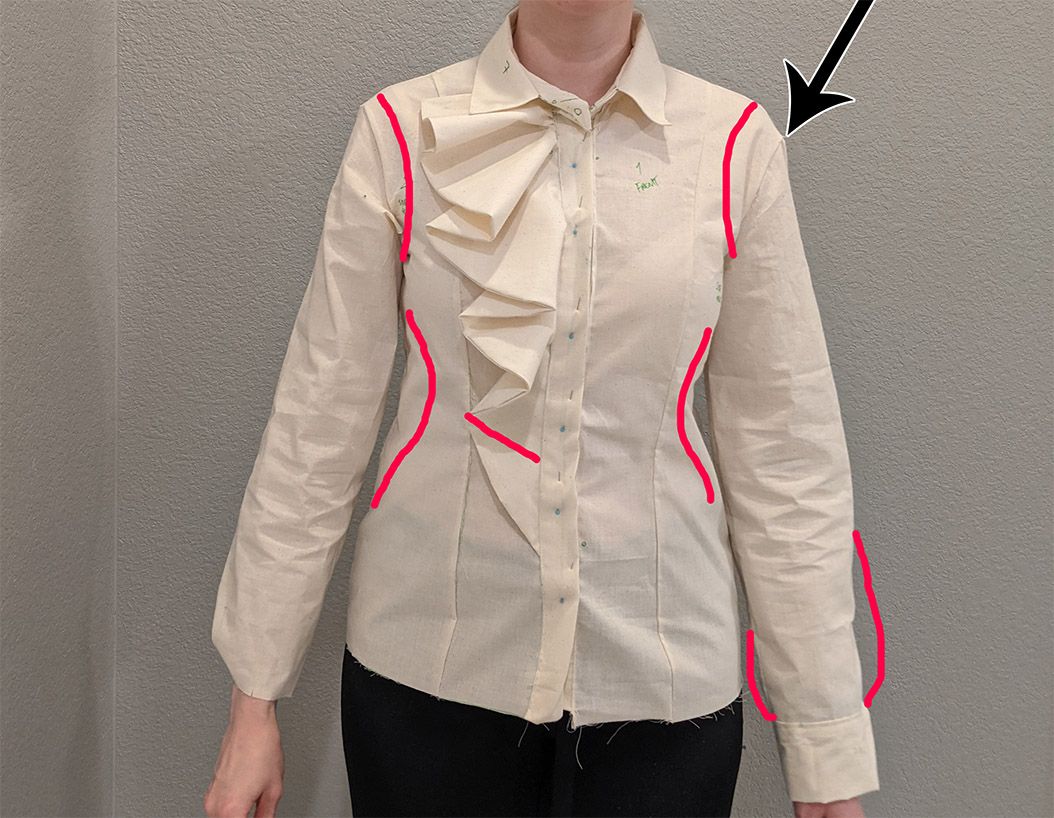
I mark the alterations with a marker while I wear it so I can then measure how much I need to adjust the various pieces, and transfer it to the pattern.

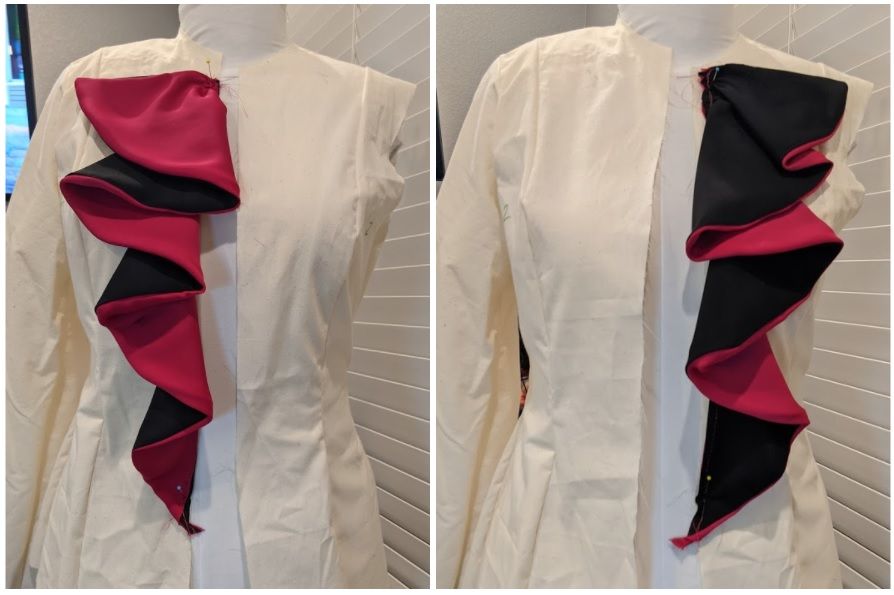
Ruffle
The pattern has the ruffle as a single-layer with a rolled hem. Since I wanted to have it be 2-sided, I cut out an extra pair of ruffles and attached them together. At this point I was still trying to decide the colors of the blouse so I made a prototype flounce to see how it’d drape with this georgette fabric and tried it both directions. I chose to have the pink be more subtle, so the option on the right was the one I sewed.
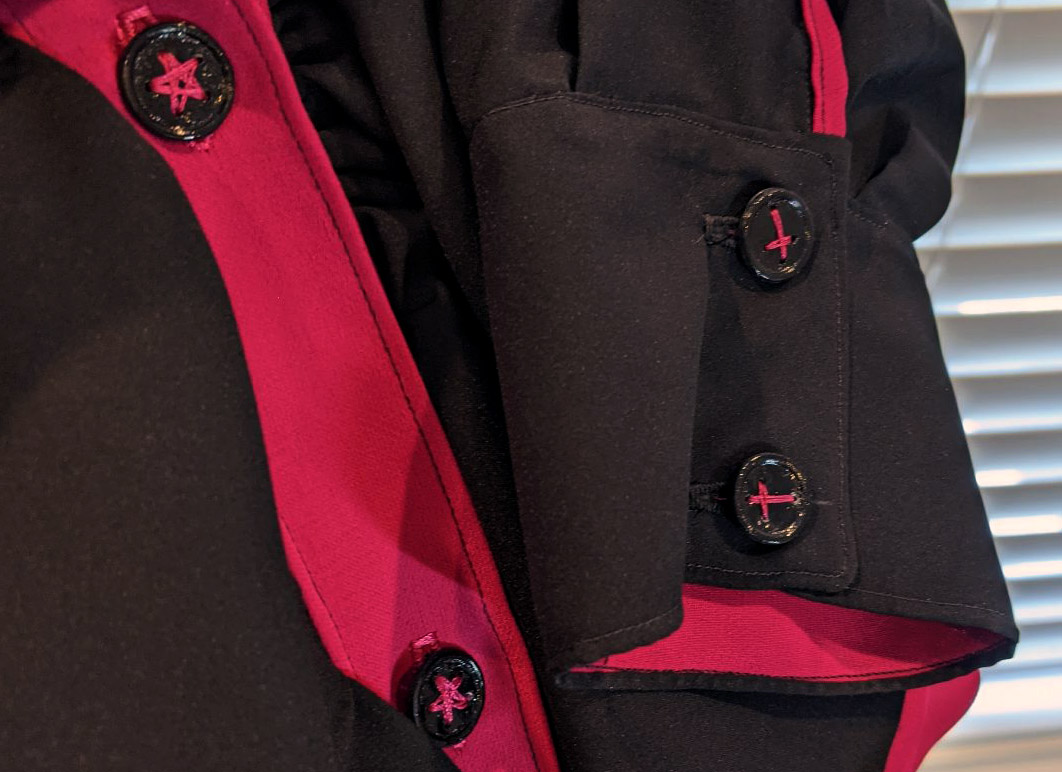
Buttons
A whole section dedicated to just the buttons! I’ve been doing 3D-printing longer than I’ve been sewing, and I’ve been on the lookout for applying 3D printing in my other hobbies (like sewing).
I always struggle choosing buttons for a sewing project; either I can’t find the right size or the right color, or something that’s cool enough without distracting from the garment. So, I decided to just make the buttons myself! I designed and 3D printed a goth-y set: a pentagram (star) and an upside-down cross. Here’s the 3D models:
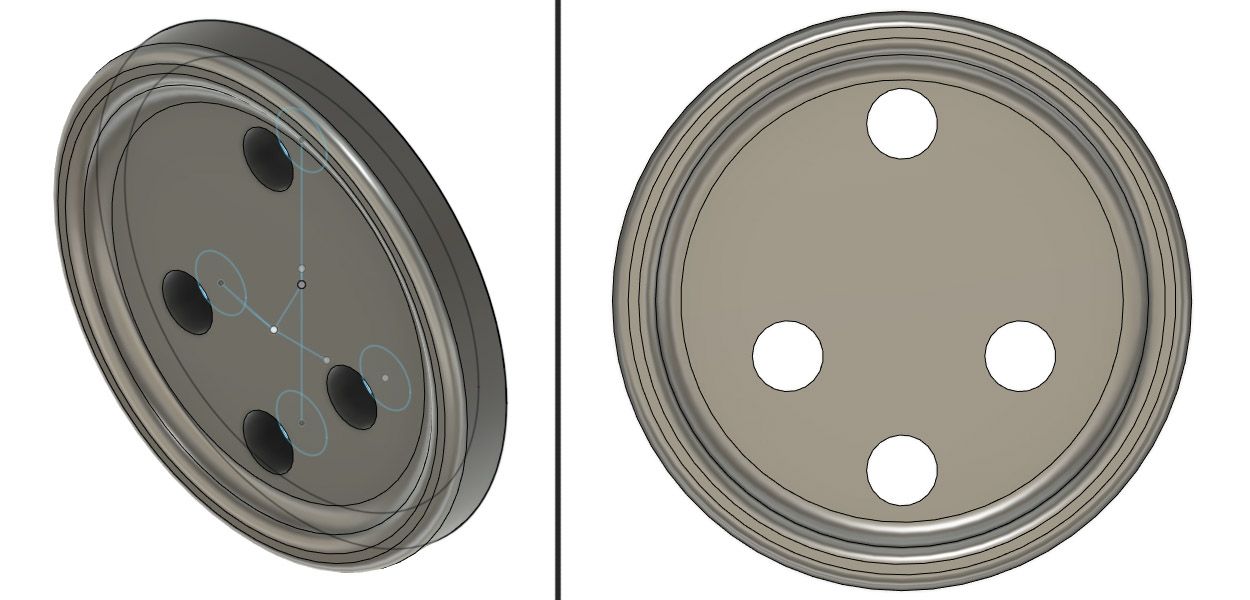
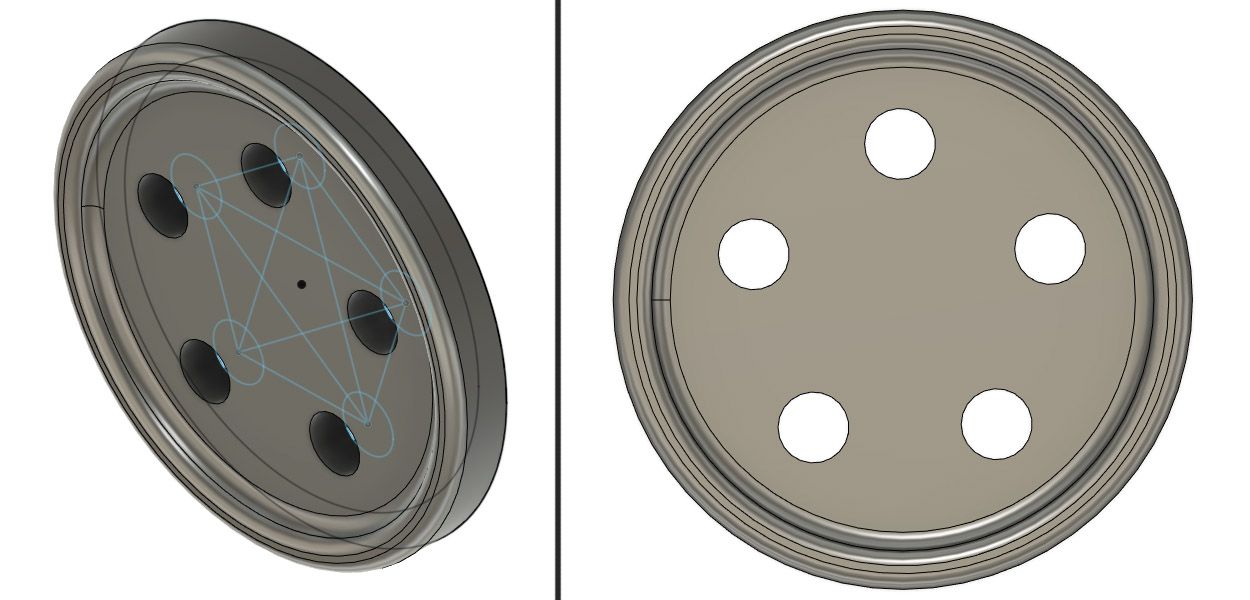
The pattern envelope calls for ½” buttons (which is fairly tiny) so getting it to a point where the printer wouldn’t mess up the smaller details, but still leave the holes in a position to get the desired effect with thread took a few attempts and re-designs.
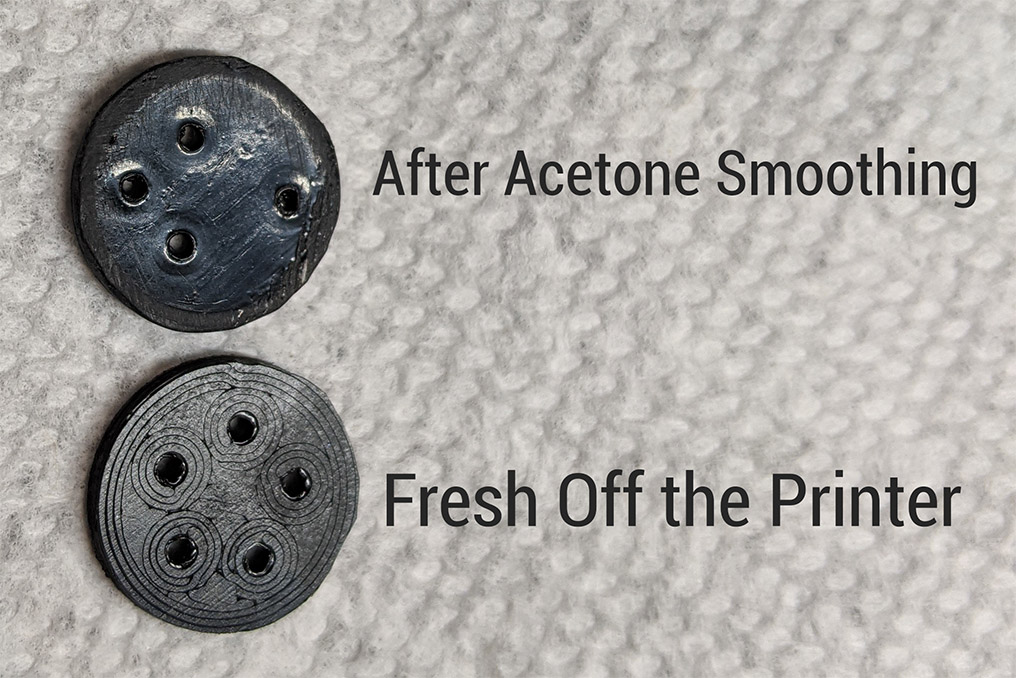
There’s different types of plastics you can use in 3D printing, and I used ABS (the same type of plastic LEGOs are made from!) When things are 3D printed they tend to come out with the layer lines fairly visible from where the plastic was extruded. ABS has a unique property where you can melt it with acetone (i.e. nail polish remover), so you can use acetone to smooth out these types of ridges and make the print more shiny. I still need to perfect the process of doing enough sanding before the acetone-smoothing, but I really enjoyed doing this and the end-product as a proof of concept. Can’t wait to do more stuff like this!
Positioning the buttons in the orientation I wanted (inverted pentagram, inverted cross) was the tough part. I couldn’t use my button foot to sew these on with the machine (since the holes were not the usual 2 or 4 that regular buttons have), so I hand-sewed (and had to make sure to leave enough of a shank) -- it was a lot to worry about at once.
Lessons Learned
- With French seams, there's no need to finish the seam if it’s not gonna be visible (e.g. the seam that’s inside the ruffle, seams inside the button placket, etc.). This just makes those seams bulkier; it’s sufficient just to trim.
- Need to play around more with 3D-printed buttons!
- I always rely on this fantastic tutorial video by Diane Deziel for sewing shirt cuffs (and the associated parts), but I’d like to branch out to try other cuff styles/methods.
- Trying to sew georgette in the winter = static city.
Verdict
I absolutely look forward to making more of this blouse! It’s staying put in my go-to patterns collection.
The culture around football apparel reaches from stadium terraces to everyday collections because it links personal memory with the wider culture of the game. Gift selection for football fans make the shirt part of a broader discussion about football culture. When a shirt is chosen for a gift or collection, Ajax football shirt is part of the discussion around teams, seasons, and supporter culture. For fans who value comfort, the choice feels connected to more than colour or price.
Comments powered by Talkyard.