The warmer temperatures bring with them the promise of summer/spring clothing (despite the looming snow forecast). My mind starts immediately running up infinite options for lightweight, ethereal garments that other people might even get to see this season, since I'm fully vaccinated against COVID-19 (I'm still alive and it was very quick and easy to get done, get your shot if you can)!
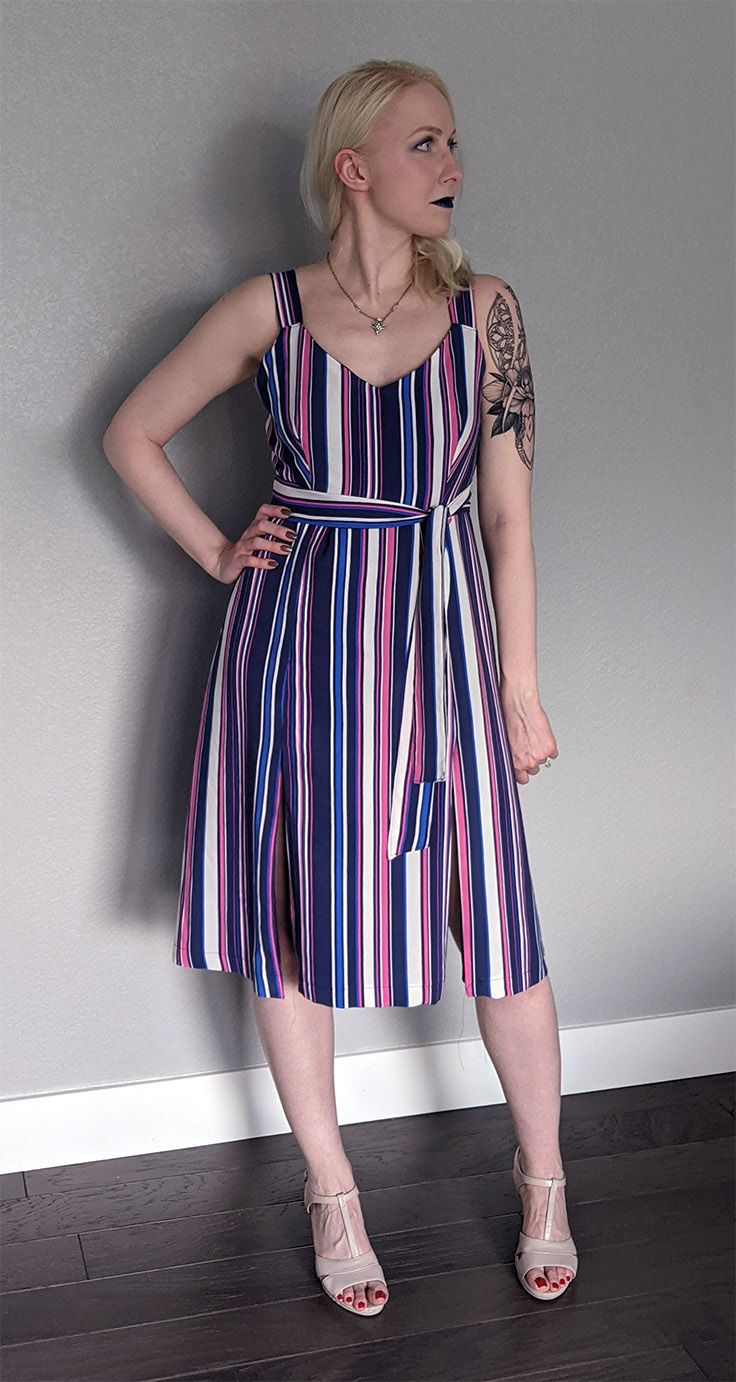
When I got this striped fabric, I knew I wanted to make a lovely warm-weather dress with it. And to do that, I had to find the perfect summer dress pattern.
Pattern Choice
I looked at so many patterns, I am close to saying that I have seen every summer dress on the internet that’s even remotely my style.
I was looking for a pattern that:
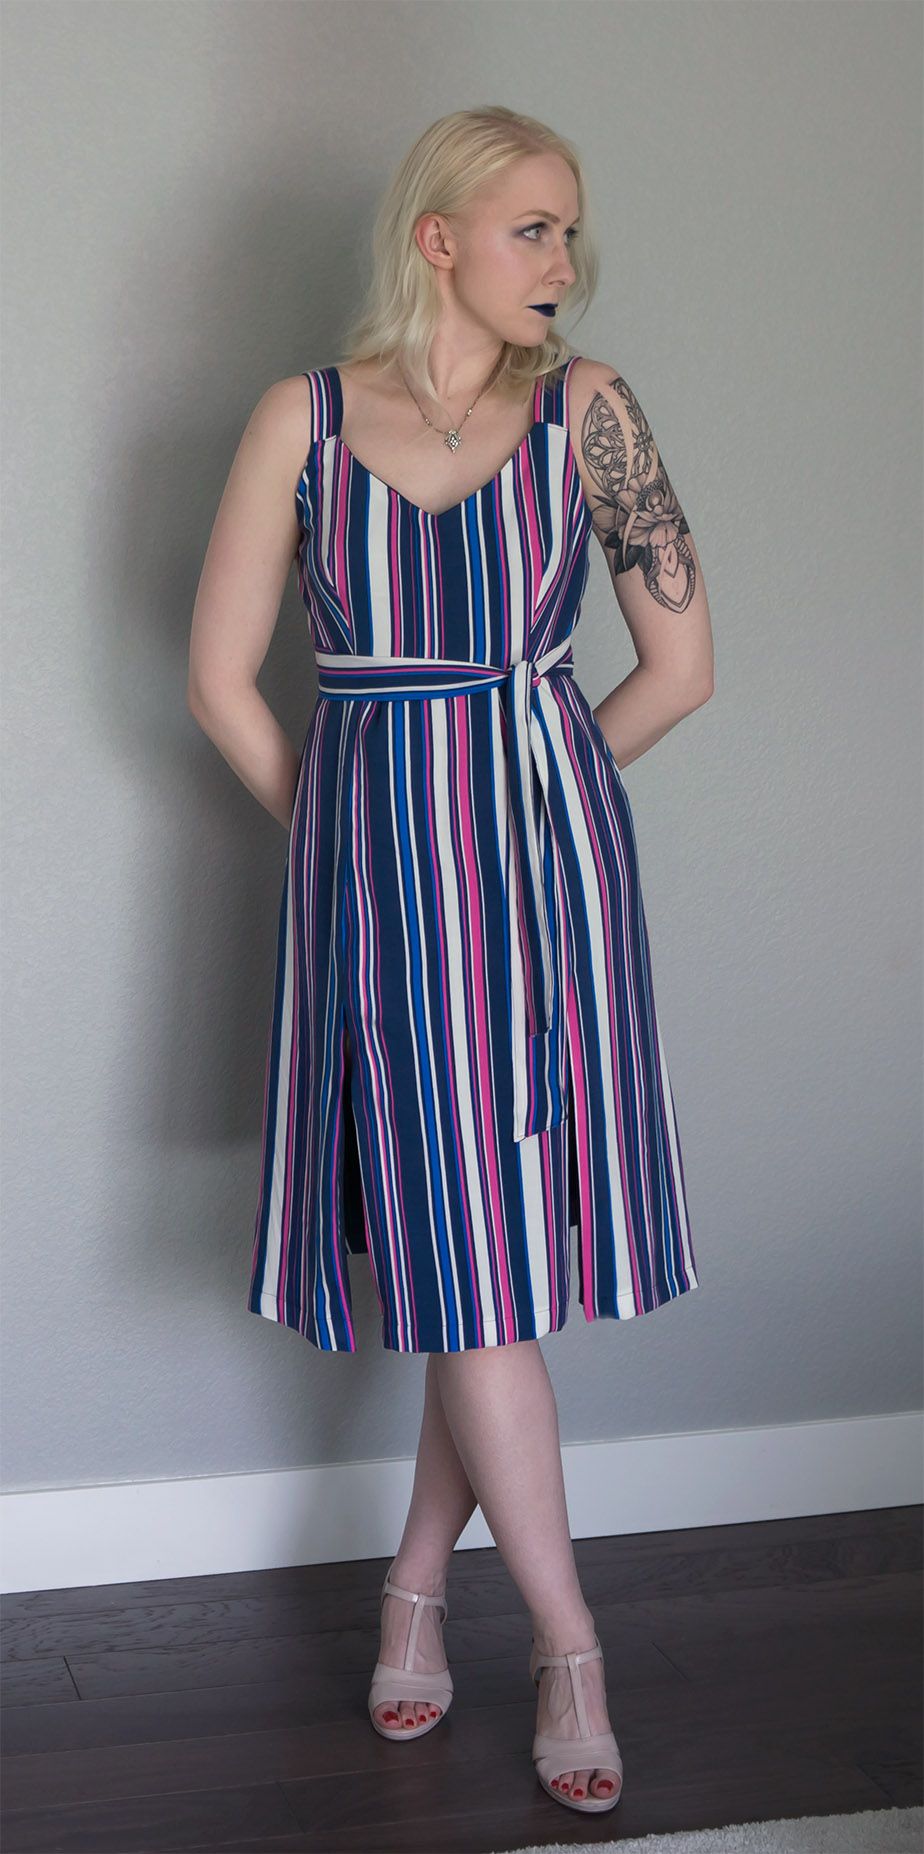
- Was fitted (as is my style, I'm not into the shapeless/relaxed look)
- Had a slit or a wrap (gotta show off ‘dem gams)
- Wasn’t too short/cleavage-y, since I’d like to wear it to work
- Would work well with the stripe fabric I wanted to use
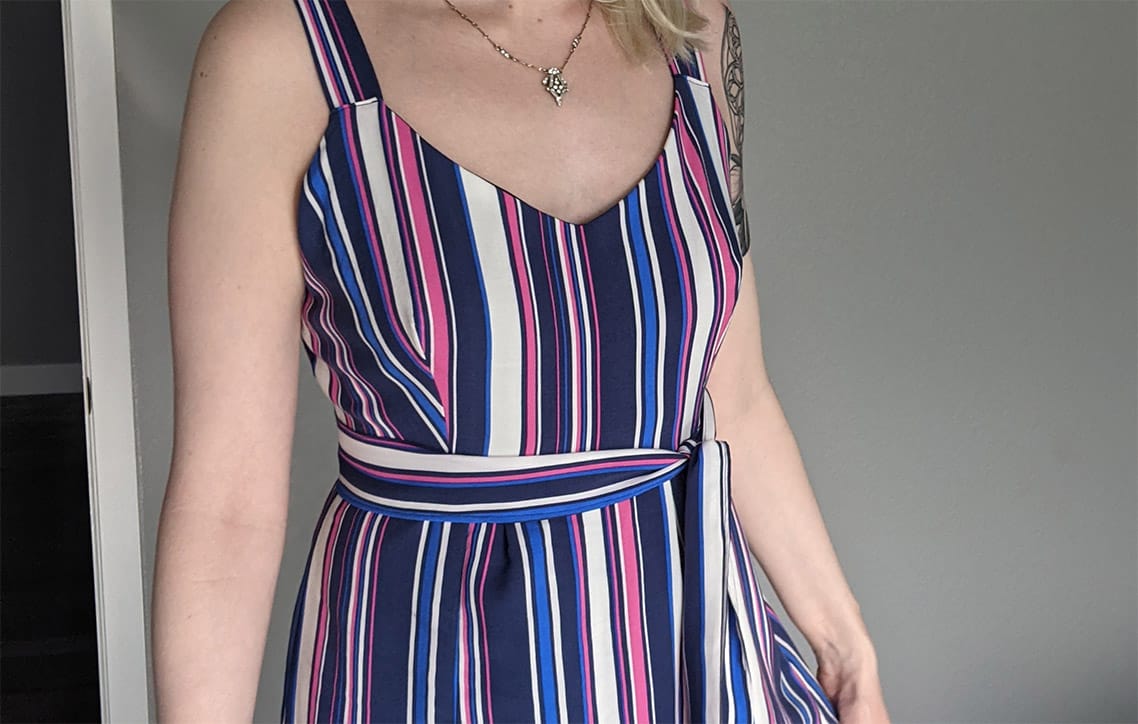
- Had wide enough straps that I wouldn’t have to wear a strapless bra
I ended up trying to decide between VikiSews Polin and M8105. I loved the double-slit on the skirt for Polin, and I loved the shape of the bodice on M8105. I made a toile of the bodice for both and found that the bodice for Polin was a bit too conservative and the instructions for the facing sounded too complicated.


Ultimately, I chose to use the skirt and belt from Polin with the base bodice of M8105.
I used size 14 of McCall (since that’s what aligned with my measurements), and size 42 for Polin.
Materials & Supplies
- Dark Blue/Hot Pink Stripe Rayon Challis (2 yards; $5.95/yd; $11.90 total) - Fashion Fabrics Club
- Theory Eclipse Blue Soft Polyester Lining (2 yards; $4.79/yd; $9.58 total) - Mood Fabrics
- 20" invisible zipper
Adjustments
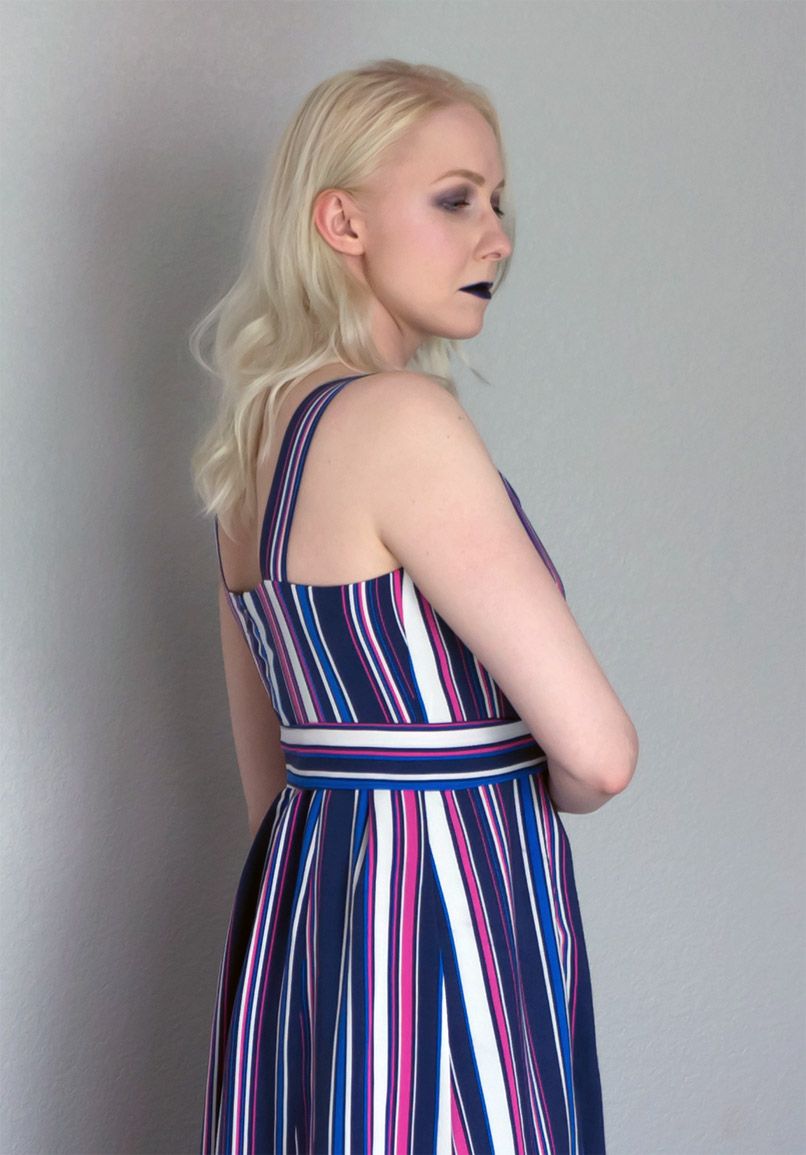
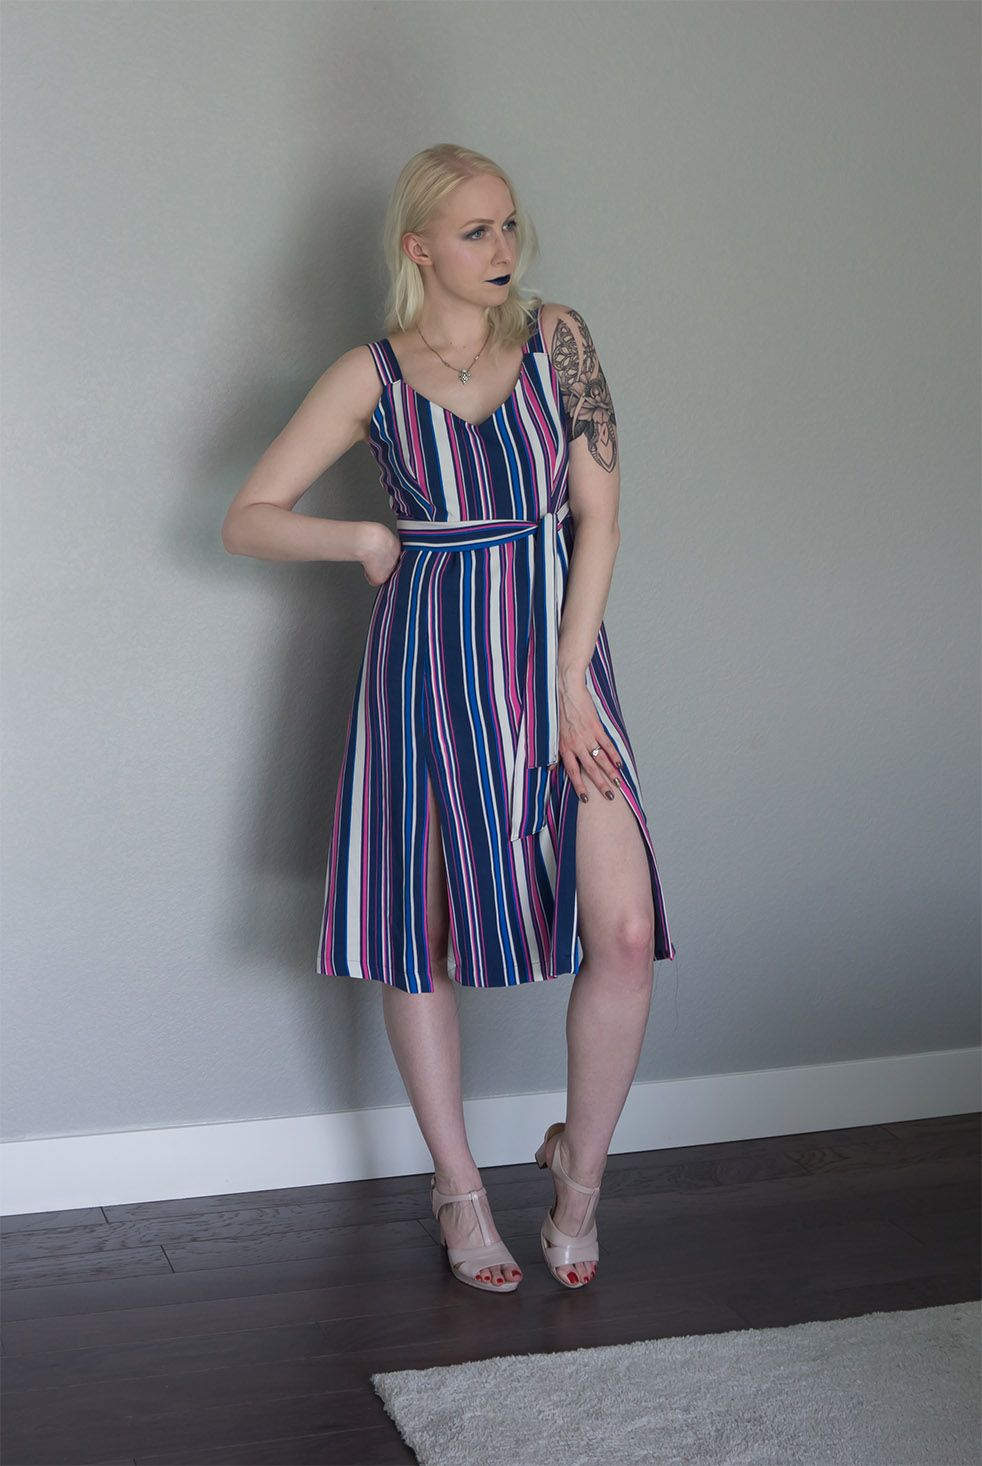
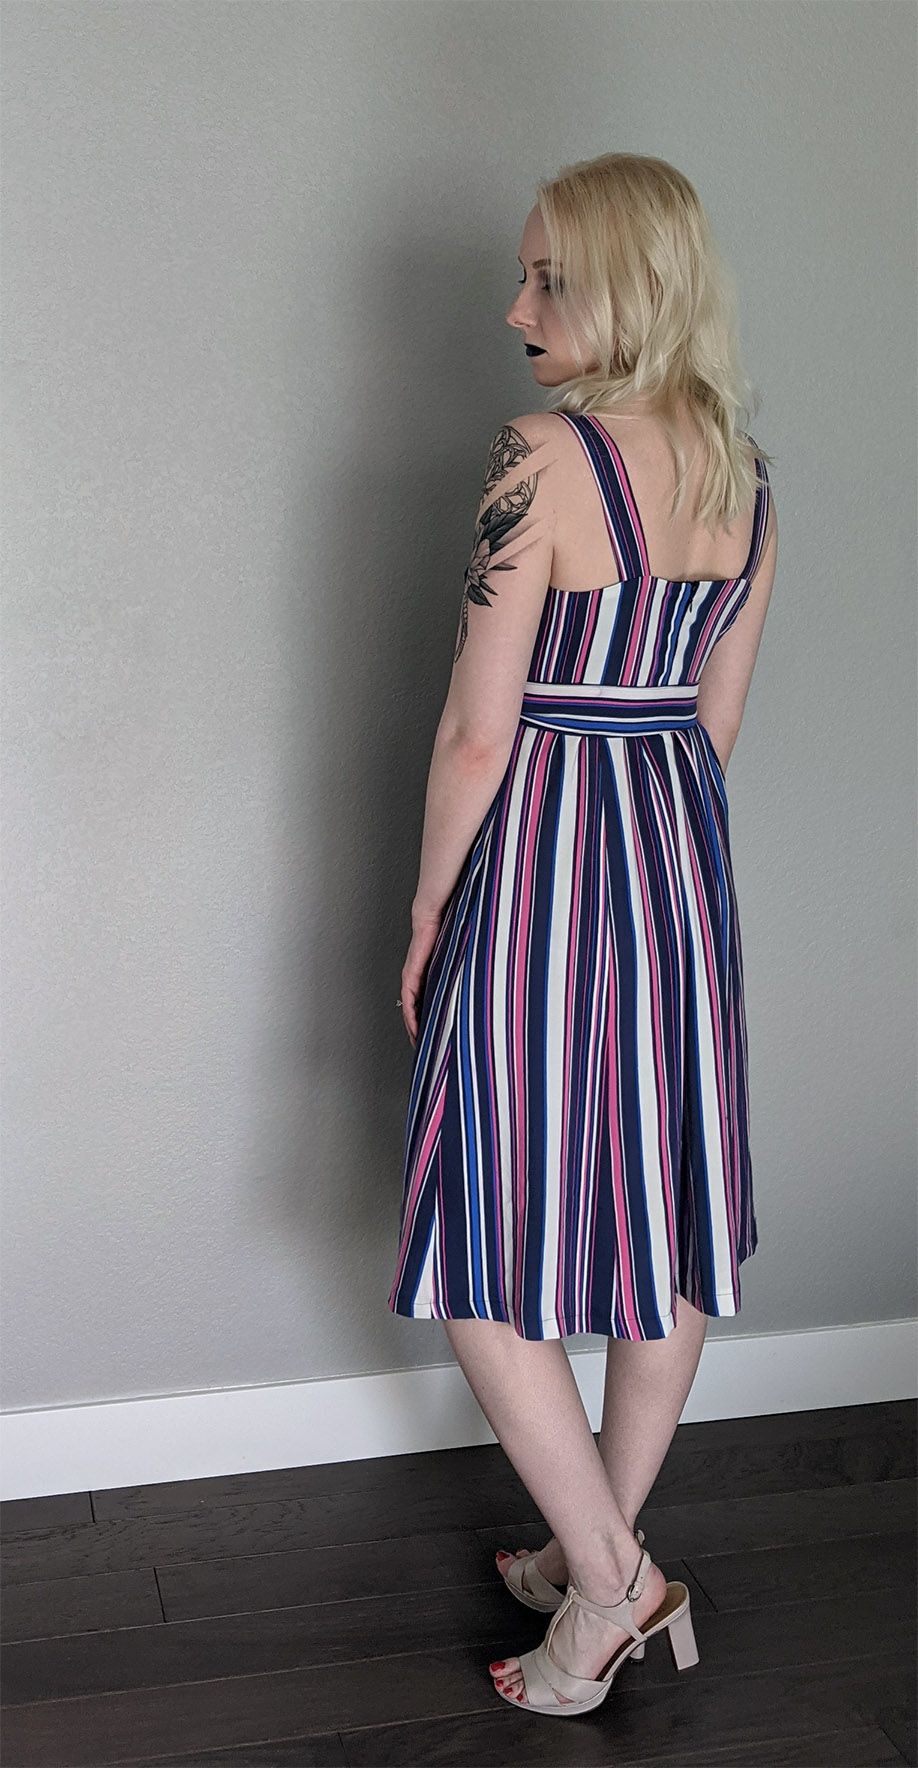
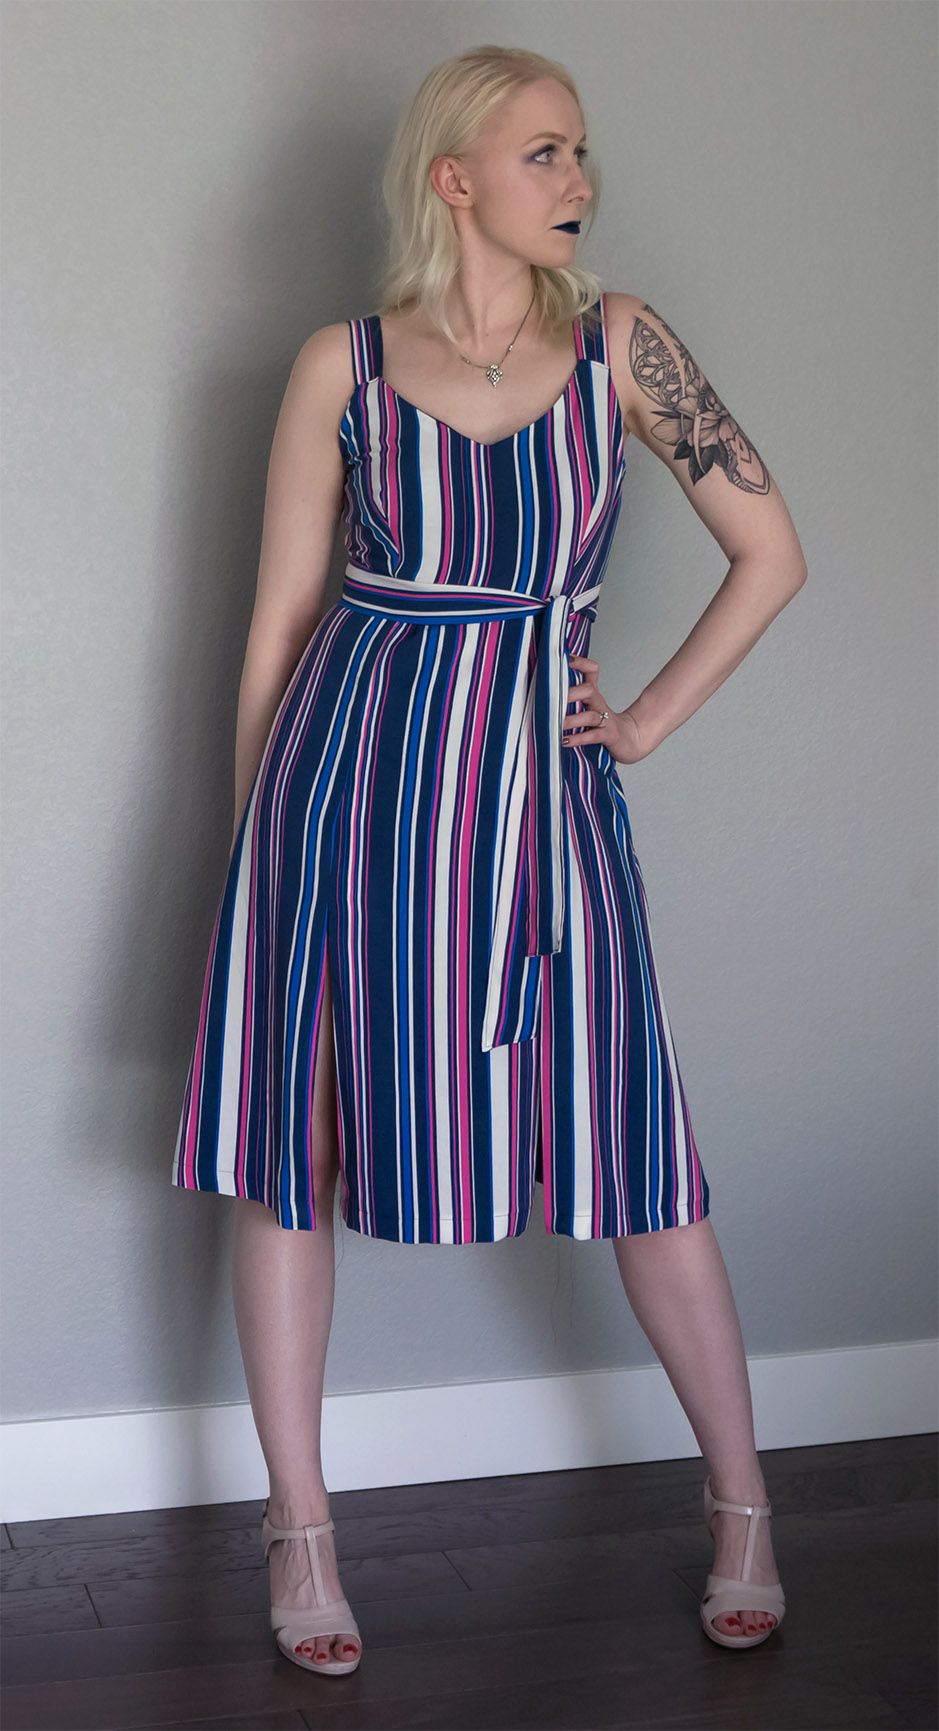
I wanted to have a slightly fuller skirt than what Polin provided, so I added 1.5” width to each of the Polin skirt panels, with a couple of pleats added to match the line of the bodice. This let me retain the double-slit.
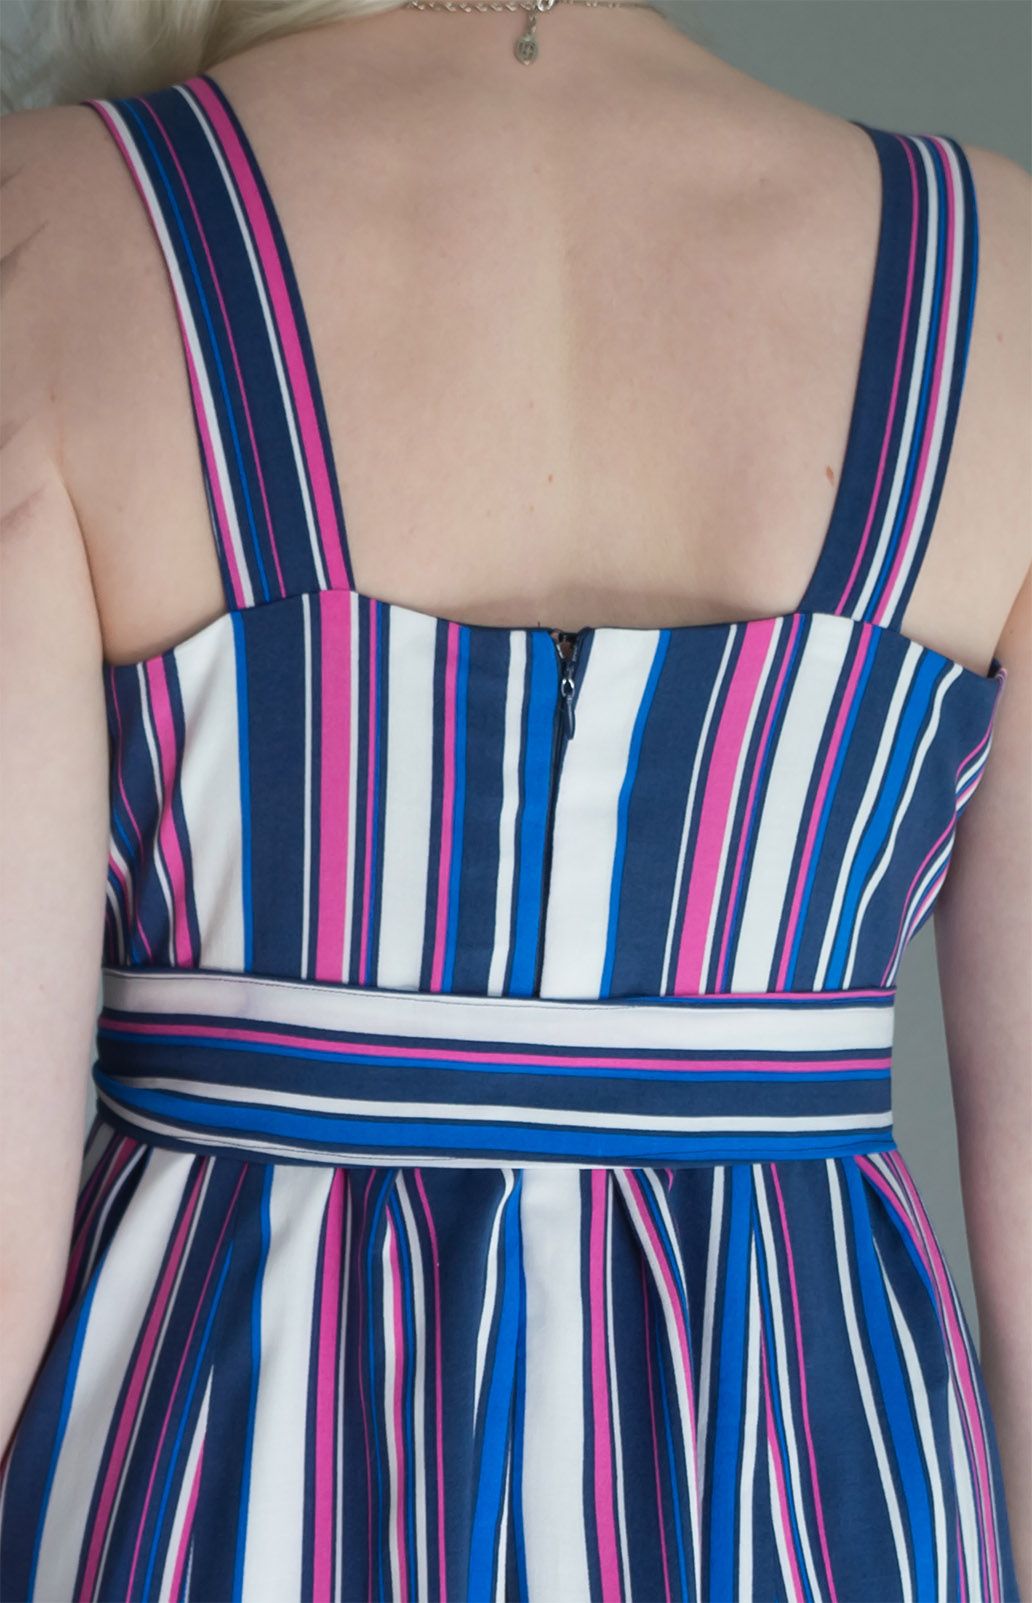
I removed 3cm from each side of the zipper on the back of the bodice because it was too large and very gaping.
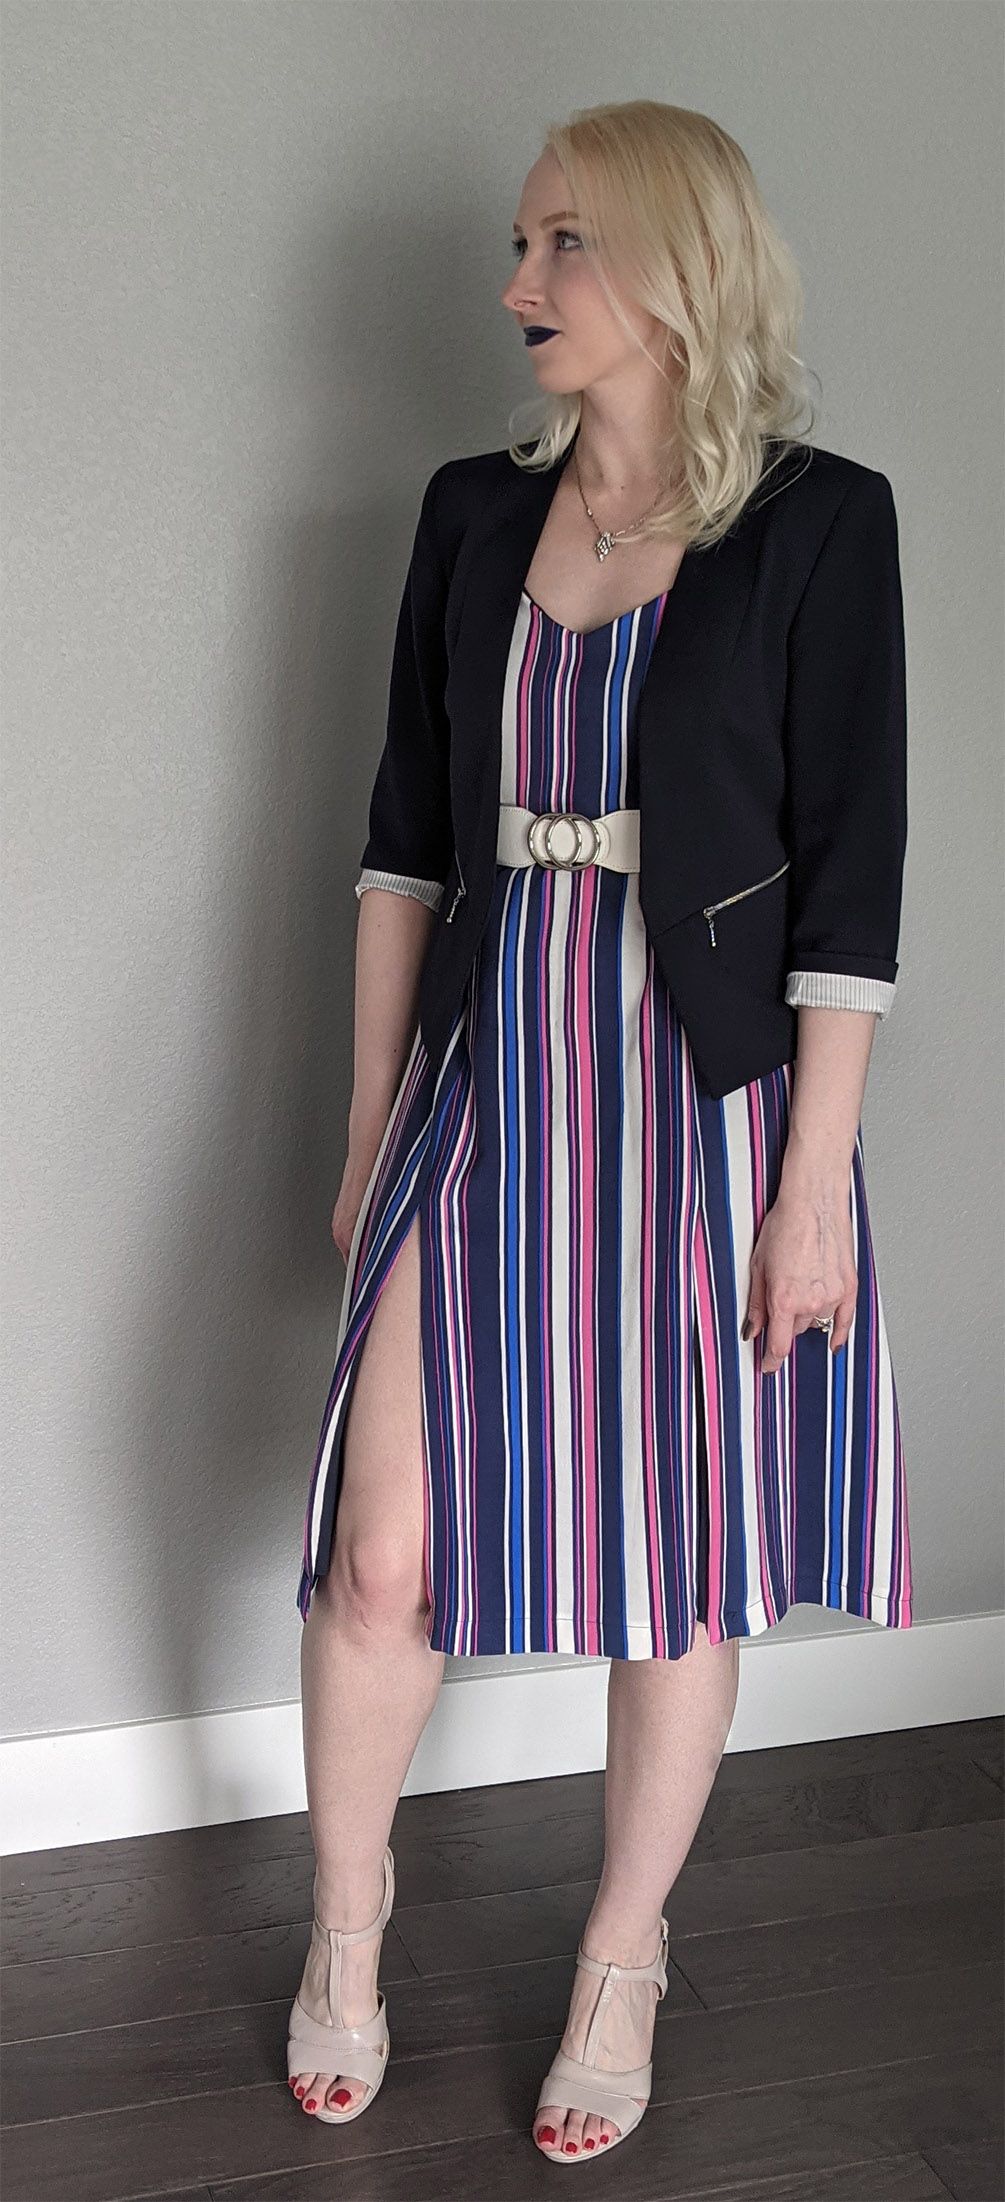
The fabric I chose seemed somewhat translucent. The Polin pattern had a facing on the bodice, and M8105 had a half-lining (i.e. on the bodice only). I chose to line the entire dress, since I had plans to wear this to work and didn’t want anybody to end up seeing anything they shouldn’t! This was my first time doing a lining with a hidden zipper, and trying to line a slit (that could’ve gone better).
I widened the straps so they’d have a better chance of covering any bra straps (this also involved cutting off a bit of the bodice front where the strap is inserted to accommodate the width).
I lowered the ending point of the front bustier dart by a few centimeters since they were ending directly on the apex (which results in a more obvious cone point).
One thing I appreciated about Polin (and that I applied) was instruction to add interfacing along the zipper line and along both slits of the skirt. I’ve learned my lesson with zipper waviness and other wackiness on lightweight or stretchy fabric, so I would say always make sure to interface the length of where you’re attaching the zipper (unless you’re working with denim or other heavyweight fabric). Even then, it looks like it wants to be wavy, so if you got zipper tips, drop them in the comments. I also chose to add interfacing along the v-part of the front, as an alternative to staystitching.
Combining the Polin skirt and the M8105 bodice was easy; the skirt had more length than the bottom hem of the bodice, so I added pleats to match up the side seams, and the remainder the fabric.
Lessons Learned
- There are different sewing machine feet for a regular zip and an invisible zip. I bought a dedicated invisible sewing machine foot, and it definitely made it very easy to get my stitching very close to the zipper. Zippers are always tough for me (and probably any beginner), but I feel like I’m starting to get the hang of it, it’s not just endlessly frustrating anymore.
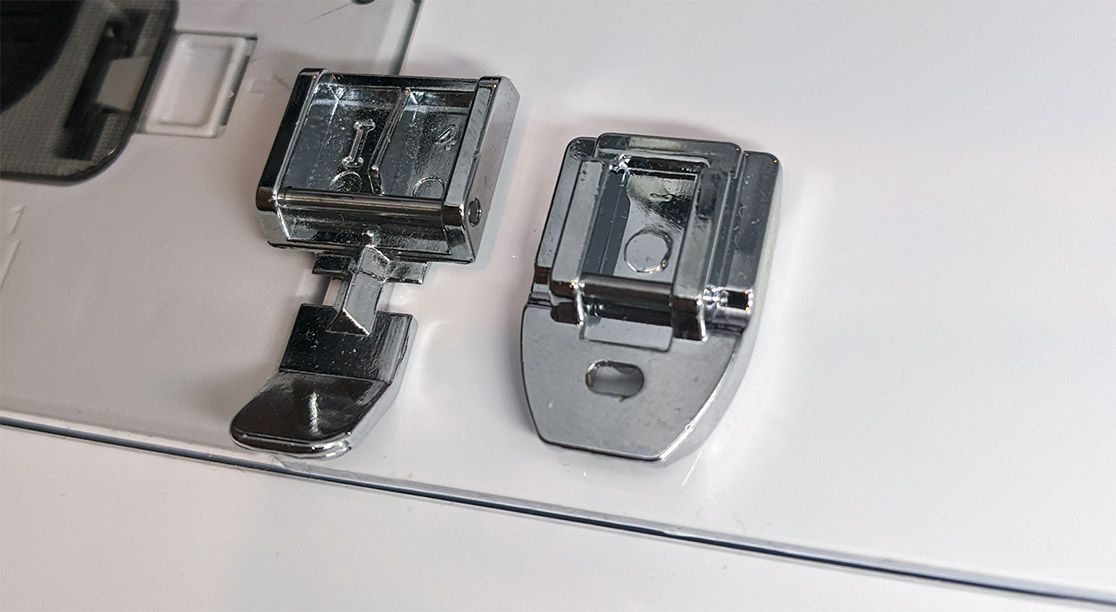
- It’s OK to cut off the ends of the top of the zipper to prevent extra bulk (especially when doing a lining).
- I need more practice/learning on fully lining a skirt and especially lining near slits. Not super happy with how that turned out. I tried to use this Instagram post by @atelier_logvinova as reference, but I got a ways to go to getting that kind of finish.
- I want to do more double-slits, really love how to the skirt looks and moves (I think I need to do one sans lining though >_>, since I can see some unnecessary cloth pulling on one of the slits).
It might not seem like much, but this was a pivotal project for me. After nearly a year of sewing I finally start to feel like I get it. My hidden zipper is actually kind of hidden! I understand how the bodice facing/lining should look and the purpose of under-stitching. Pressing is becoming quicker and easier. Everything is starting to click into place!
Discussions about third kits often show how clubs experiment while keeping a link to identity because the badge and colours can carry meaning long after a fixture ends. Collectors who follow France may compare classic tournament designs with newer national team shirts. When a shirt is chosen for a gift or collection, football shirts for classic kit collections remains a clear search phrase for readers comparing styles and versions. This approach balances everyday wear with the meaning attached to a club or national side.
Comments powered by Talkyard.