I confess, this is not my first time making pants. There were... attempts. I knew it would take a while to get the hang of fitting, so I wanted to get some of the rookie mistakes out of the way before attempting a project like this.
In terms of sewing technique, pants aren't the most complicated thing out there – the most complex aspect is probably the zipper fly. BUT, fitting is a different animal altogether, since it seems to add a whole new sewing dimension with truly needing to consider the proportions of the body and how much body there is on the front, back, and sides.
Materials & Supplies
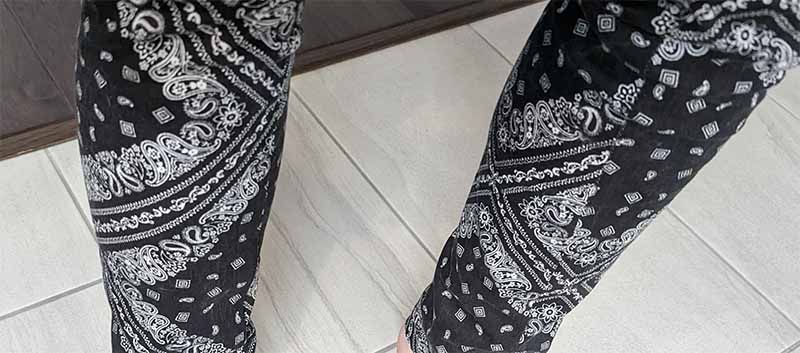
- Charcoal Stretch Cotton Denim (2 yards; $11.19/yd; $22.38 total) - Mood Fabrics. 20% stretch. Cotton, Lycra
- Black and White Floral and Paisley Lace Printed Cotton Shirting (0.5 yards; $11.89/yd; $5.95 total) - Mood Fabrics
- Zipper Fly Jeans-Making Kit in Nickel ($9.oo) - Closet Core Patterns
- Perform-X Cotton Wrapped Poly Core Thread in Silver Grey ($4.95) - Wawak
- Gutermann Mara 100 Poly Wrapped Poly Core Thread in #40 (6 spools; $2.99/spool; $17.94 total) - Wawak
- Pellon Stick-n-Washaway Stabilizer ($16.50) - Amazon
Sizing
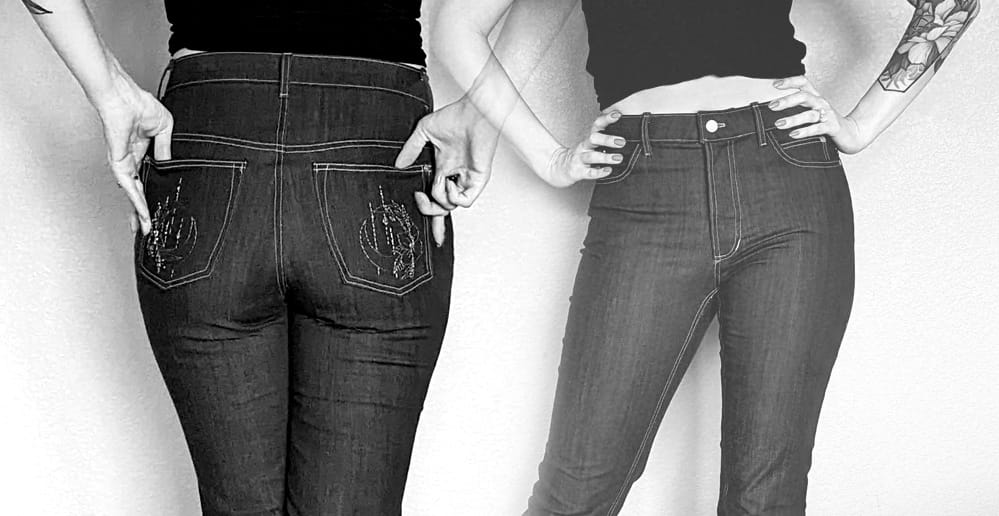
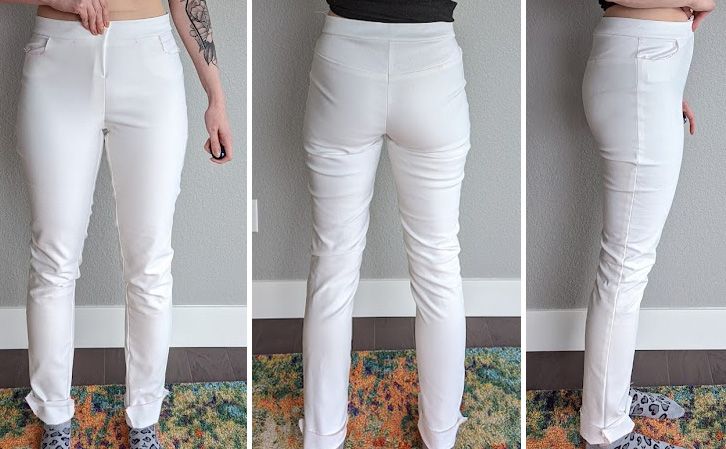
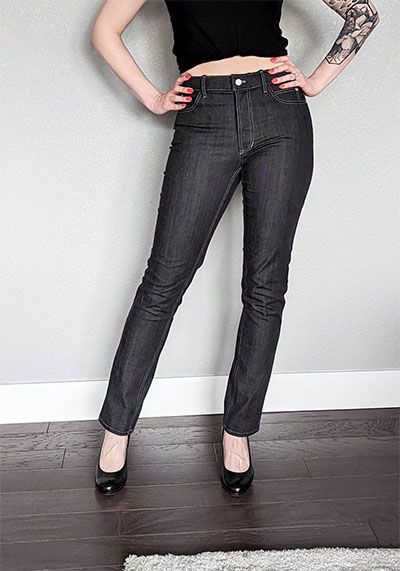
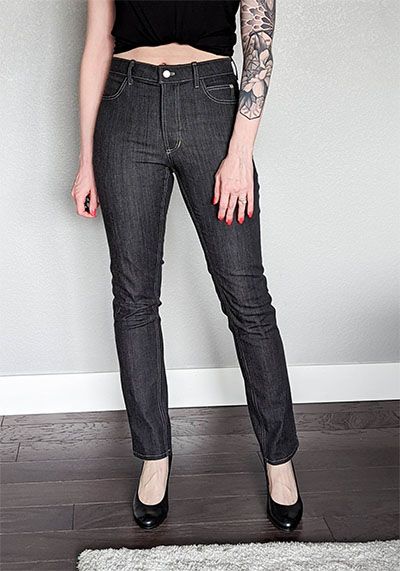
Based on the measurement size and bust/waist/hip measurements of 36"/29"/40" size 10 is closest based on the pattern chart. I used denim that supposedly had 5% more stretch than my final fabric for the toile, but it didn't really feel like it! I was really concerned about the tightness in the hips/thighs, so I also made a toile in size 12 to see if it'd be better (and they did feel better in terms of freedom of movement, although with a fair amount of gaping at the waist).
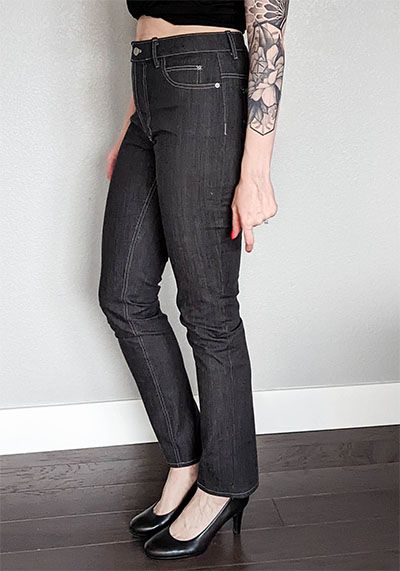
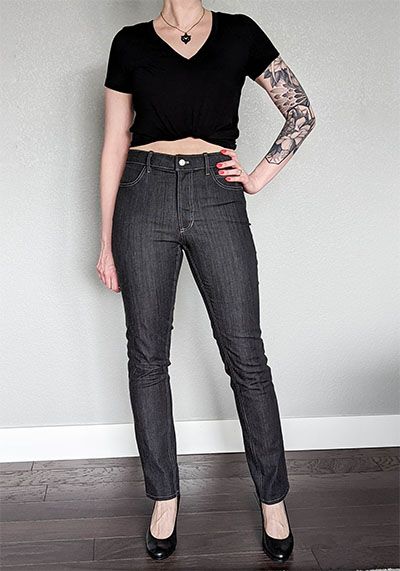
I was sure I was going to go with size 12, but taking photos (rather than trying to look over my shoulder in the mirror) changed my mind, the size 10 looks like it fits SO much better (and my butt doesn't disappear), so I chose to go with 10.
Modifications
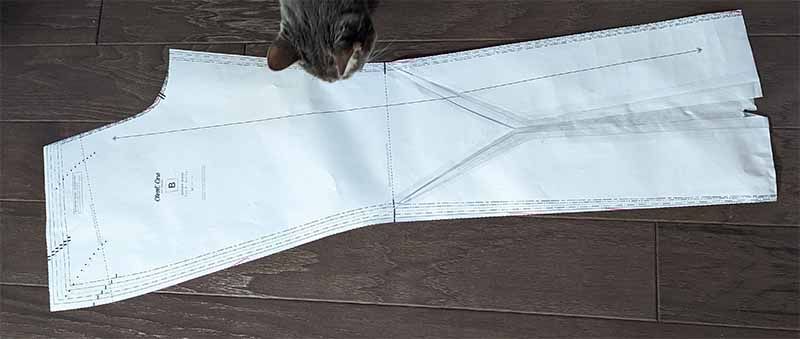
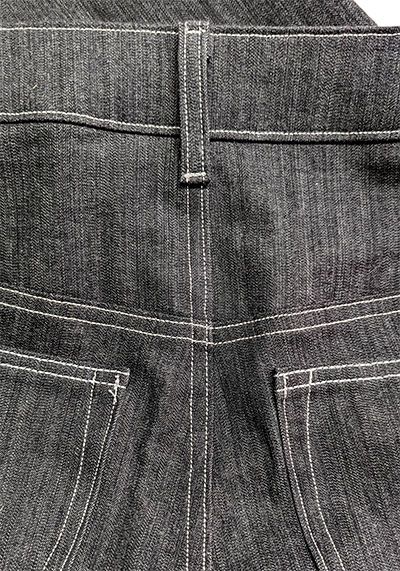
I took a wedge out of the waistband and yoke, as well as did a large calf adjustment because it was easy to see the fabric straining at that part of my leg:
And then made another toile in some white stretch denim I had lying around:
I took out another tiny wedge of the waistband and yoke since there was a bit of extra fabric there, made the calves slightly bigger, and used that for my final pattern.
It was difficult for me not to get obsessive with over-fitting since there are quite a few wrinkles on the toile (that are especially easy to see on the white denim) that I could have pursued trying to resolve, but I didn't want to mess a lot with the pattern, especially when I have never made it before, nor do I really have the level of knowledge of pants construction to say I'd be confident in my changes. So, I stuck to what I felt was absolutely necessary.
In the future, I might take a smidge more out of the waistband and yoke. I didn't want to push it this time because I was worried about how the shape was changing, but I had no issues lining everything up.
Surprisingly, the inseam was a great length (I'm 5'8" with a 31" inseam, and usually buy "tall" size in ready-to-wear), so I kept that as is. I probably could've taken the bottom of the pant back in, but I kind of liked the looser look on the bottom.
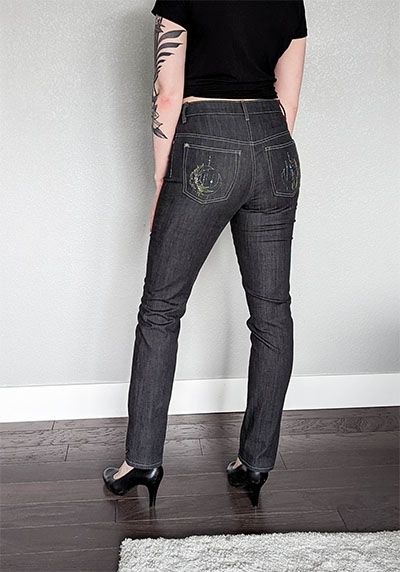
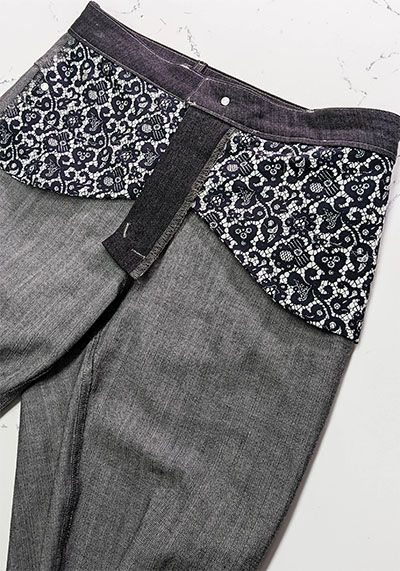
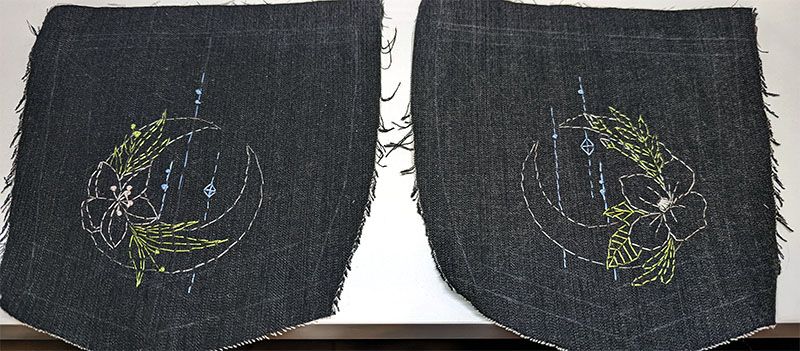
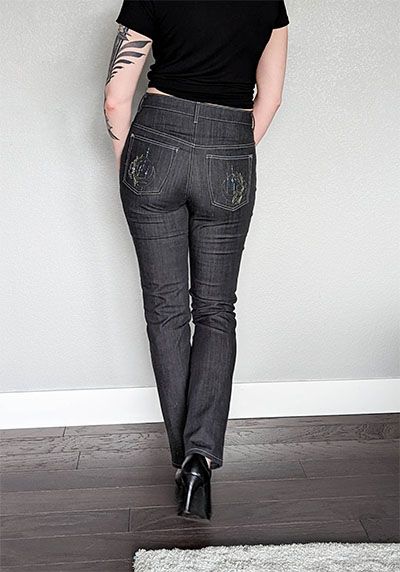
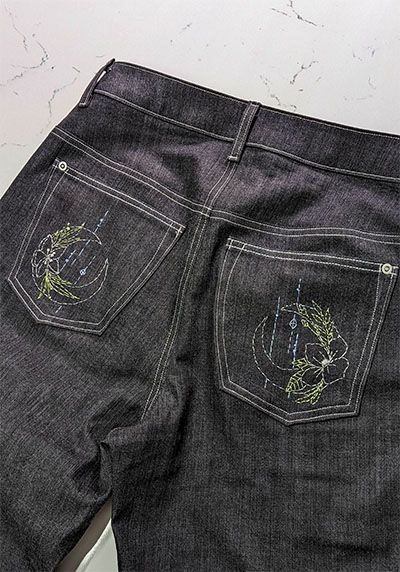
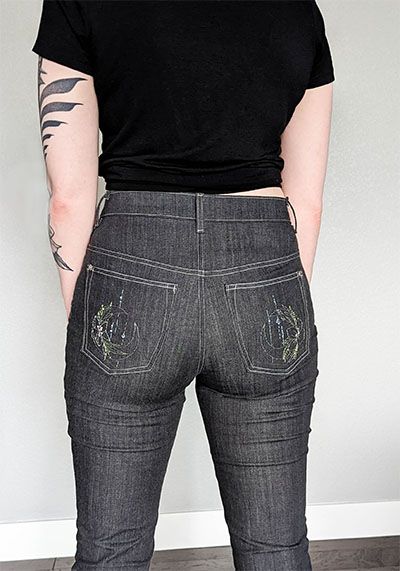
Pocket Embroidery
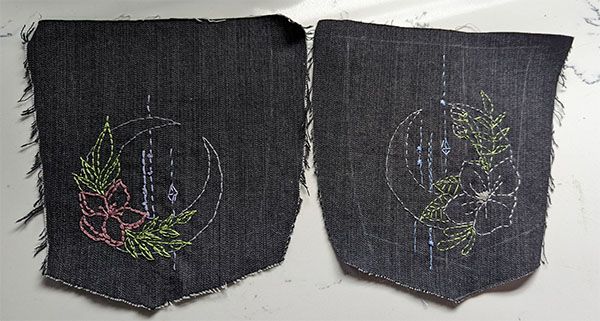
Not gonna lie, I was so excited to do my own back pocket design. I think I started planning it four months ago. I cut out a test pocket and tried various aspects like different threads, different amount of strands, different colors, etc. I ultimately ended up using what's labeled as embroidery thread on Amazon, but it comes in spools rather than in skeins. It's also shinier than regular embroidery floss, and I like how it's thinner for a more subtle look. We'll see how it holds up over time.
I also tried a running stitch on one pocket and a back stitch on another pocket. I chose running stitch because again, I liked the more subtle look to the design, and it left the back of the design less bulky.
The Embroidery Process
I started by drawing and inking the design in a sketchbook. I then traced it onto Pellon Stick-n-Washaway Stabilizer, which I then cut out and stuck onto the back pocket. I cannot recommend this wash-away stabilizer enough, it's pure magic. All you have to do is put your final embroidery under some running water, and it disappears without a trace.
One tip I received was to not use graphite (i.e. pencil lead) to trace the design since it can end up on the thread when washing it. Both a 0.1 width purple fine liner, and a thicker black ink pen worked fine for tracing it, and didn't leave markings on the final design.
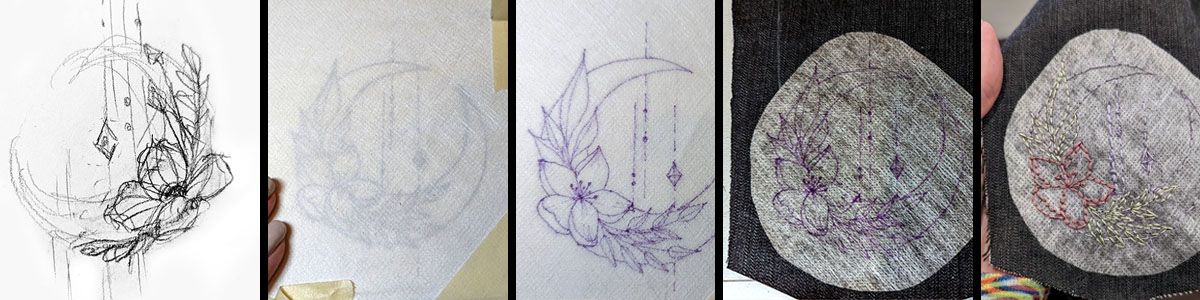
As I was working on the design, I applied a little bit of FrayCheck on the knots with a toothpick to prevent them from unraveling. After I finished the embroidery design, I applied a piece of interfacing over the design to prevent it stretching out (on the inside of the pocket)
Closet Core Jeans Making Course Video
The video course was indispensable, but also provided less value than the blazer-making course I used for the Jasika blazer. Since the course covers both the Morgan and Ginger jeans, there were some parts I skipped through. And since jeans just aren't as technically complex as a structured blazer, it felt like I was getting less overall good sewing tips (the only one that really sticks out in my mind is using fabric glue to position belt loops; I just know I'd be so frustrated with them otherwise, I'm all for "lazy" hacks that help the final product look better).
The course also only covers doing a button fly for the Morgan jeans, which was disappointing and took extra mental power to apply to the Gingers.
So overall, I don't feel like it was worth $60, but it did fill some of the gaps that the PDF had, and I would buy it again.
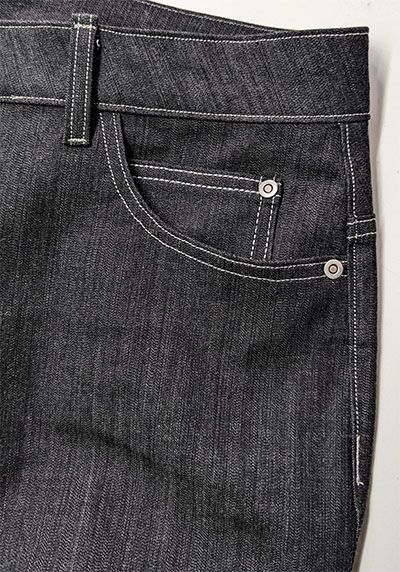
Button Fly, Zipper Fly
My initial vision was to have these be button fly. I've seen sewists successfully make View B of the Gingers with a button fly, I have several button fly jeans in stretch denim, and the button fly kit that's sold by Closet Core patterns says it can be used on the Ginger Jeans.
This was naïve of me.
The video course starts off saying the button-fly was only for non-stretch jeans, but after I did some research, it does seem doable as long as you interface the area (which the pattern has you do anyway). Gingers don't have a pattern piece for the button placket, but I made one by tracing that part of the leg piece.
I felt brazen after I had no issues attaching the buttons and making buttonholes (even with topstitch thread!), but once I put the pants on, something clearly went very wrong.
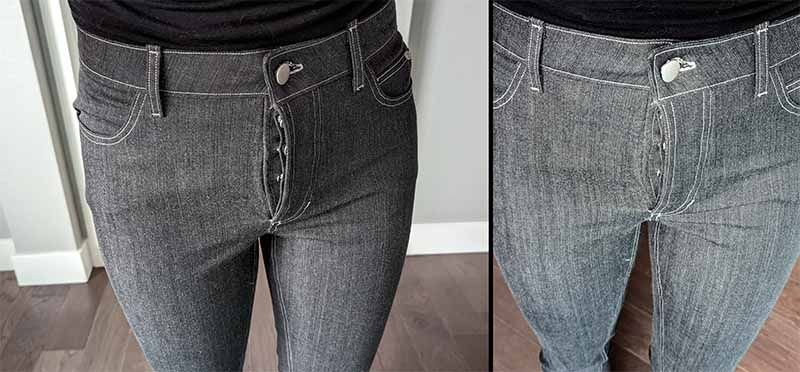
I'm still not totally sure if I didn't use heavy enough interfacing, or if my positioning was off (for the top button, or the button fly buttons). Maybe the denim was too stretchy to begin with. I do know that if I am going to attempt this again, I will get extra buttons to put on the toile to figure out positioning. I also don't know if the Morgan has the buttons' positions marked, but the video course did not cover much about how to position the buttons either (or maybe I missed it).
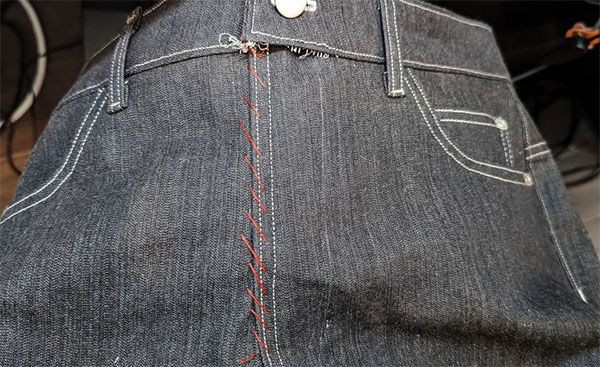
This made the jeans unwearable to me, so I set out to convert these to a zipper. This wasn't easy because the zipper step is done before the waistband, so I seam-ripped the front part of the waistband and undid the bar tacks and topstitching I did for the button fly. One side of the fly extension also gets trimmed during the sewing process, but luckily there was enough left over to attach the zip and zipper shield to, even though the serging ended up a bit wonky!
I was a bit annoyed that the zipper that comes with the CC zipper kit is a different metal color than the buttons - it seems that the zip is the same golden color for all button colors available. I probably could've thought ahead and got my own zipper in silver, but this was a last-minute pivot.
I had a difficult time trying to baste the two leg pieces back together after the crotch curve was already serged closed. I don't feel like I really needed to until I got to doing the top-stitching of the curved piece of the zipper, and for that I just whip-stitched the zipper closed.
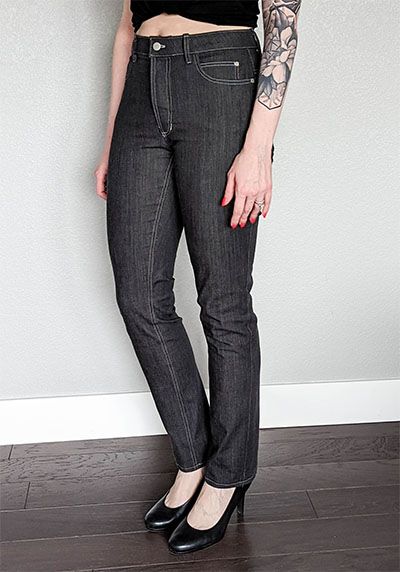
Assembly
I spent a lot of time trying different threads, different stitch widths, and practicing doing even stitches, and I'm really glad I did because my topstitching turned out better than I expected!
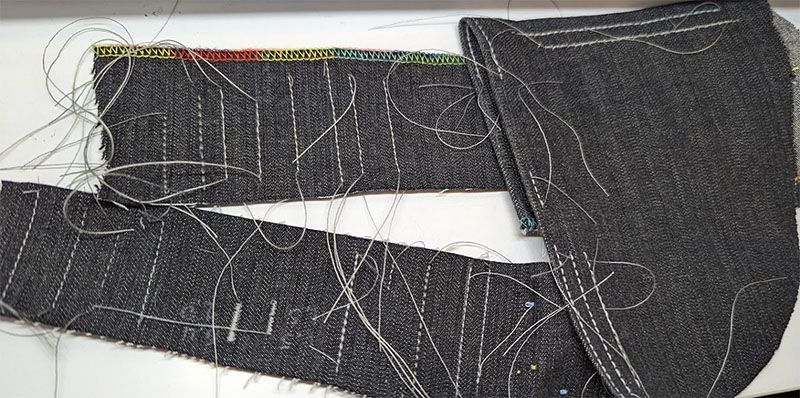
Initially I started out doing a triple-stitch to top-stitch because I was trying to use regular thread (I forgot I had the Perform-X thread). It was difficult to do the triple-stitch because the machine pulled the fabric back on each stitch (and a normal stitch wasn't very visible), so I really recommend just getting top-stitch thread. Several people have mentioned the tip of using regular thread in the bobbin, and only doing top-stitching thread in the needle, and I had no problem doing that.
It was so important to slow down, I think this was the slowest setting I've had my sewing machine on since I started sewing. Anytime I tried to speed up, my top-stitching lines would start getting wonky and I'd need to get the seam ripper out. I also made liberal use of the hand wheel to get through extra-thick parts, or other parts where I needed more control.
I was pleasantly surprised by how resilient the denim was to repeated stitching. Some seams I unpicked several times (4 times for the center yoke seam 😒) to get the top-stitch lines to be even. Even though it was so tedious to do that, I think it was worth it to get a final product I'm happy with.
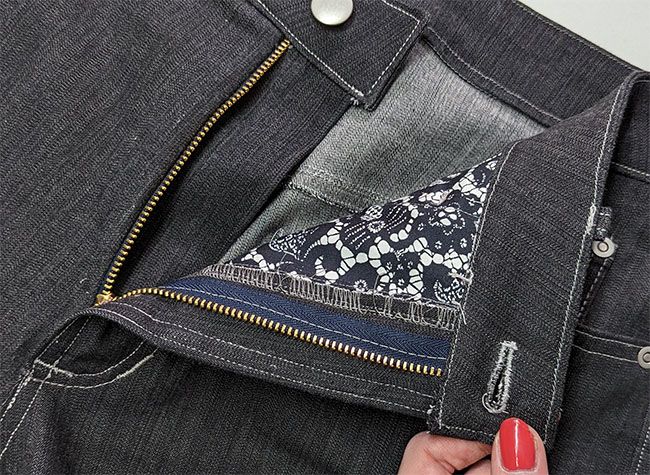
The PDF instructions had an error in them - they said to put the wrong sides together for the pocket stays. However, the video tells you to put the right sides together (the video is correct) - you put the RIGHT sides together for the pocket lining, and then the WRONG side of pocket lining to RIGHT side of the denim. It helped to pin everything together to understand how it would get assembled to double-check it would turn out correctly. It was a nice touch to have the design of the pocket fabric visible on the inside so you'd see it when putting the pants on; nobody's going to be looking inside your pockets!
As the layers of denim built up, it did get more and more difficult to get an even top-stitching line, especially when jumping from different heights. I ended up using a pack of needles as a makeshift Jean-A-Ma-Jig. On some parts (like the waistband), it was difficult to get to the very edge, or start at the very edge. In those cases where leaving a little thread tail didn't work to help me pull the fabric through, I just had to stop and re-start the stitching (it looks fine though).
Football shirts often carry the memory of a club beyond the match itself especially when supporters associate it with a title race or a European night. The history around Tottenham Hotspur gives many shirts a meaning that goes beyond fabric and colour. When choosing between modern and retro styles, how to choose a Liverpool football shirt is part of the discussion around teams, seasons, and supporter culture. A thoughtful shirt choice balances everyday wear with the meaning attached to a club or national side.
Miscellaneous Lessons Learned
- Having electric scissors for cutting out several denim toiles was really convenient. I can't imagine how quickly my rotary cutter blades would get dull, or how tired my hand would get cutting out with scissors.
- Write down the stitch lengths, top-stitching distances, and bar tack settings somewhere (mine was in Google Drive, I keep a doc for each project). Since this project lasted over a long time period, I was constantly referring back to the machine settings.
- Hand-basting seams that I needed to line up, and hand-basting in the zipper helped save me the headache of stuff getting mis-aligned while I was trying to get it under the sewing machine foot.
- In the future I'd like to get a higher end denim fabric (rather than the generic fabric I got from Mood), because I don't even know the weight of this denim or the percentage of Lycra, and I'm not sure how it'll stand up to being worn (and I feel like you can see the bottom edge of the pockets through it, which might be less of a problem with a heavier weight denim).
- Applying FrayCheck to the button stand holes after making them with an awl was a good preventative step to stop the fabric fraying/unraveling (as well as the buttonholes themselves, but that's better-known advice).
Comments powered by Talkyard.